Assign a lead, send an email, move it to the next step, then set it on StandBy for follow-ups
When an unassigned lead comes into your noCRM account, you might want to automate the initial process to increase your team's efficiency and obtain a streamlined sales process with no-code.
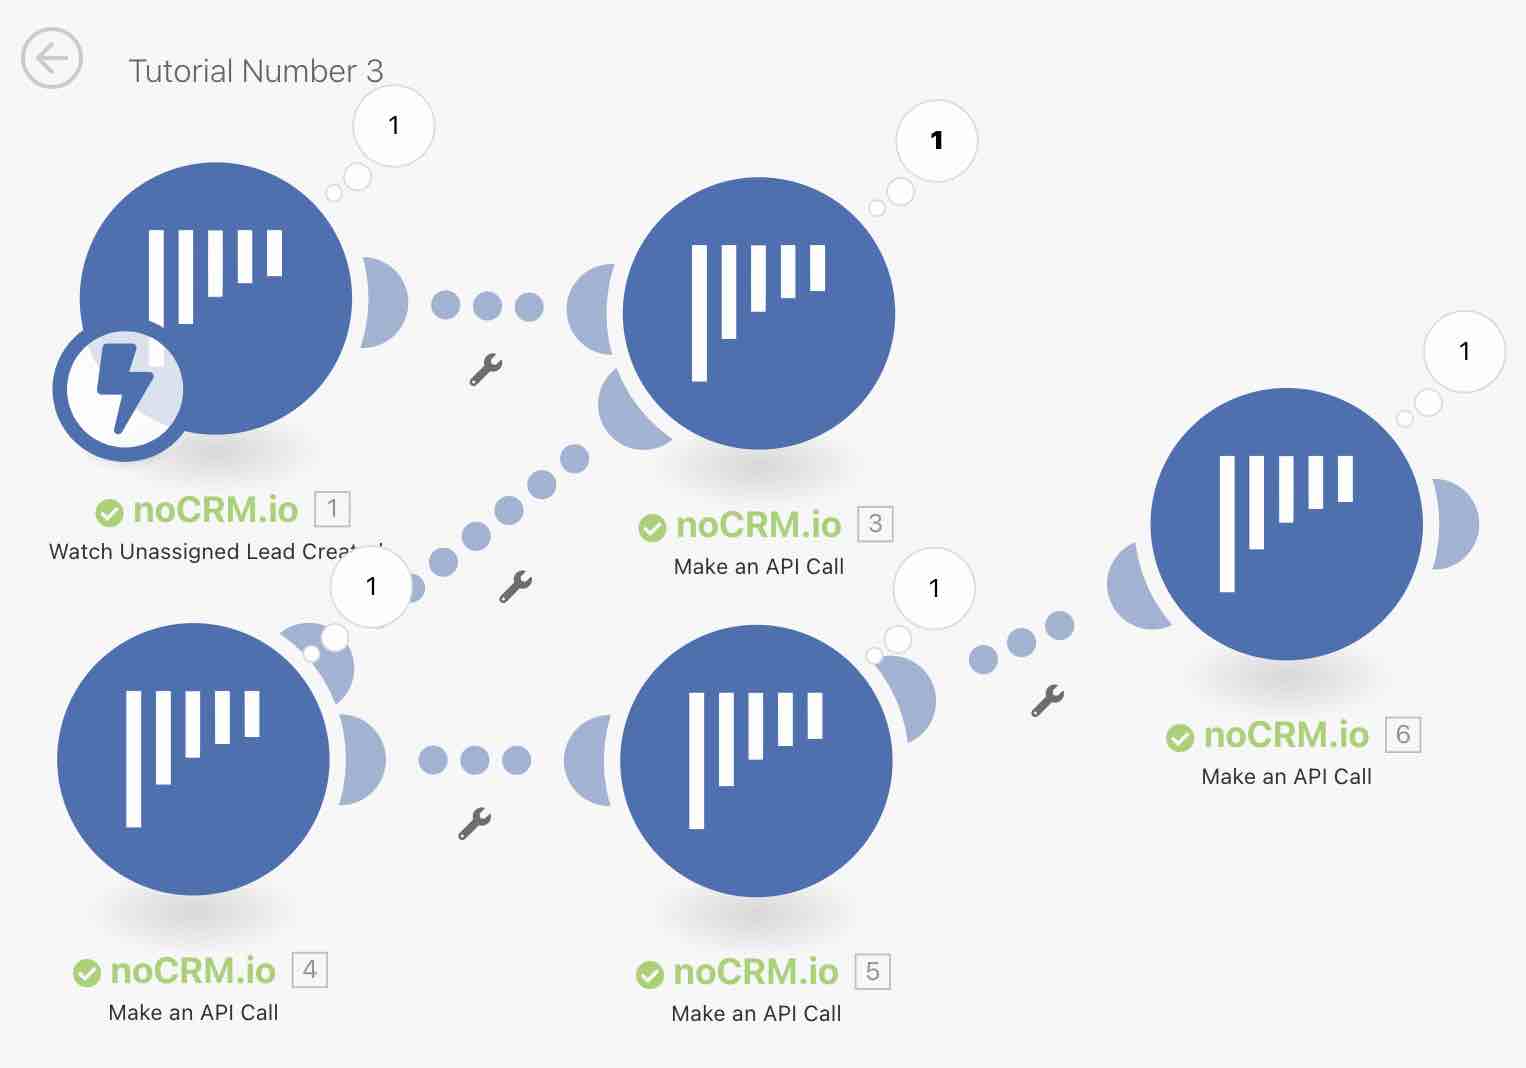
In this example, we will be automating the following process:
1) Assign the lead to a specific user
2) Send a template email
3) Move them to the next step in the pipeline
4) Change their status from "To do" to "Standby" and attach an activity to it
As an example, we're going to do this using two different methods:
The first step has been already covered in the previous tutorials. So, we'll be jumping straight into the second step: sending a template email.
Method one: Send leads a template email, then move them to the next step in the pipeline and set up a follow-up using Zapier and our simplified API
In order to send a template email, we need to use the "Call Simplified API" Action in the no-code tool, Zapier.
Following the last tutorial on assigning incoming leads to a user, add another Action and choose "Call Simplified API" and choose the noCRM.io account you connected to in the previous step.
Let's set up the Action. First, we'll select which lead Zapier should execute the action on. Click on the Custom tab and choose the lead's ID in the resulting dropdown list. This ensures that every time your Zap is triggered, it will look for the lead that just came in.
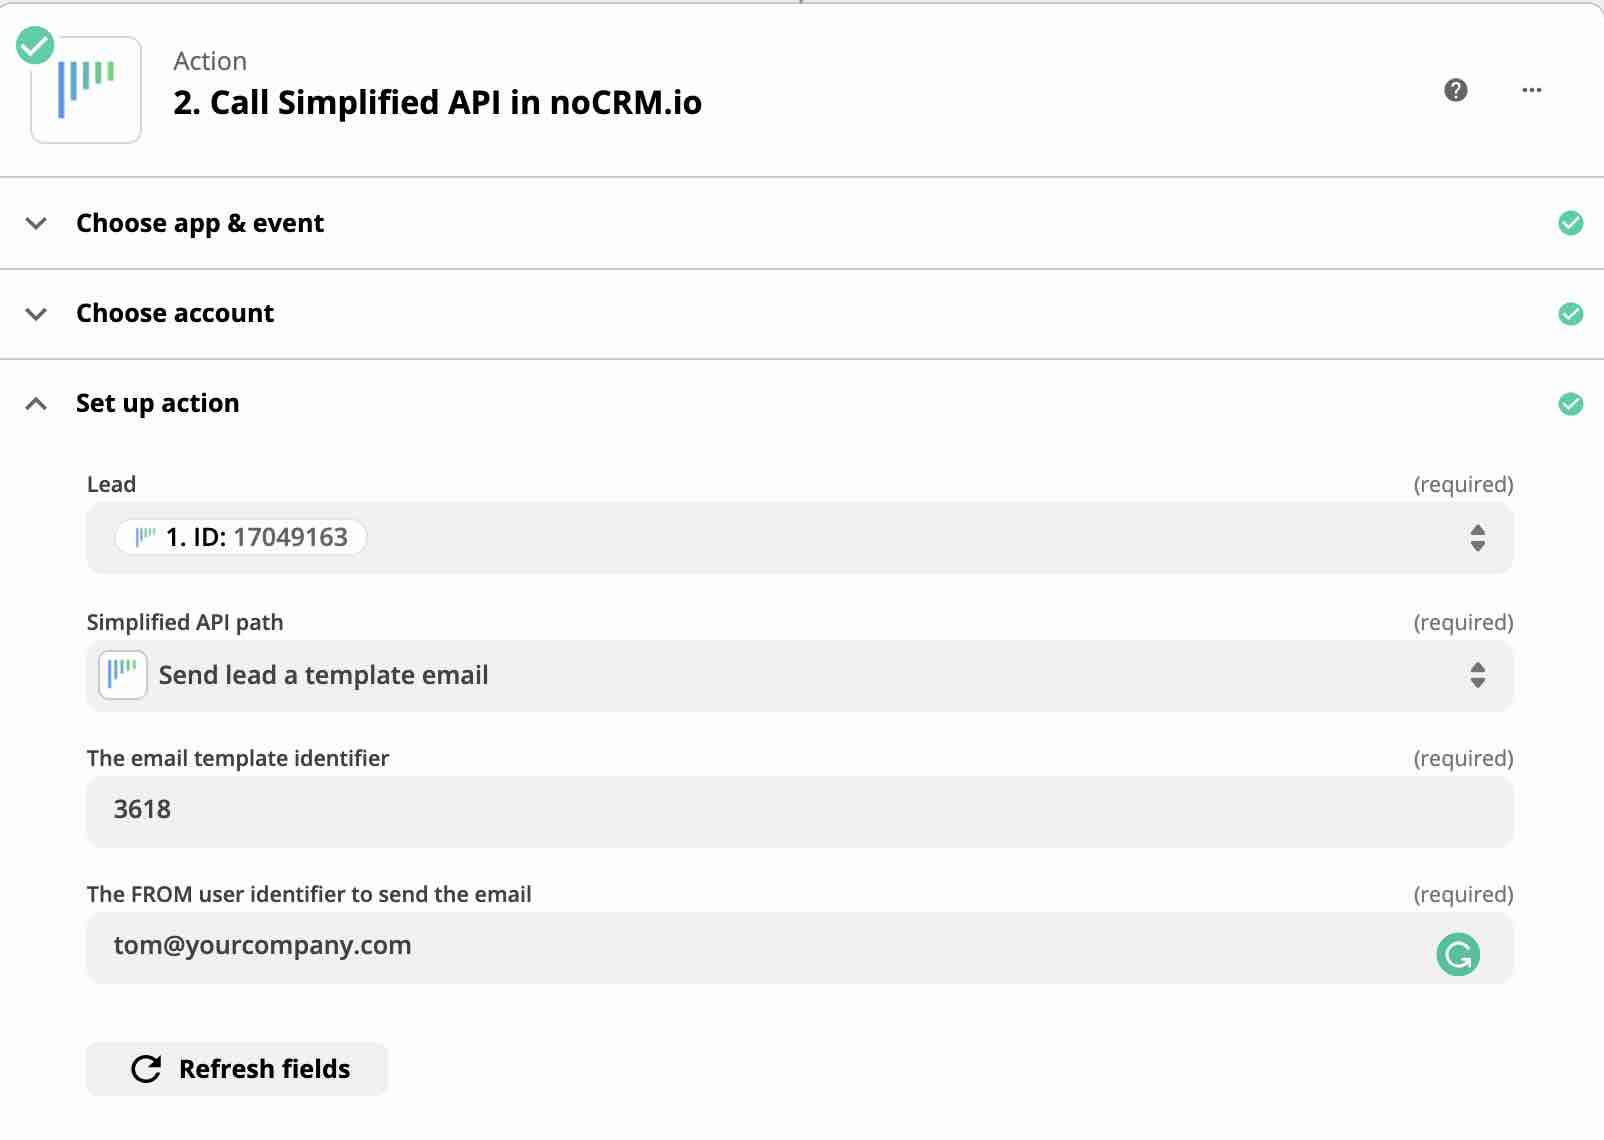
Next up, you must choose the Simplified AP Path "Send lead a template email".
In a couple of seconds, two more bars will appear for you to enter the email template ID you'd like to use as well as the email address of the user the email will be sent from.
⚠️Important:
1) Only shared email templates can be used.
2) The user whose email address you enter must have their email account connected to noCRM.io.
3) To find the template ID, go to Admin Panel > Integrations > API > Account Object IDs.
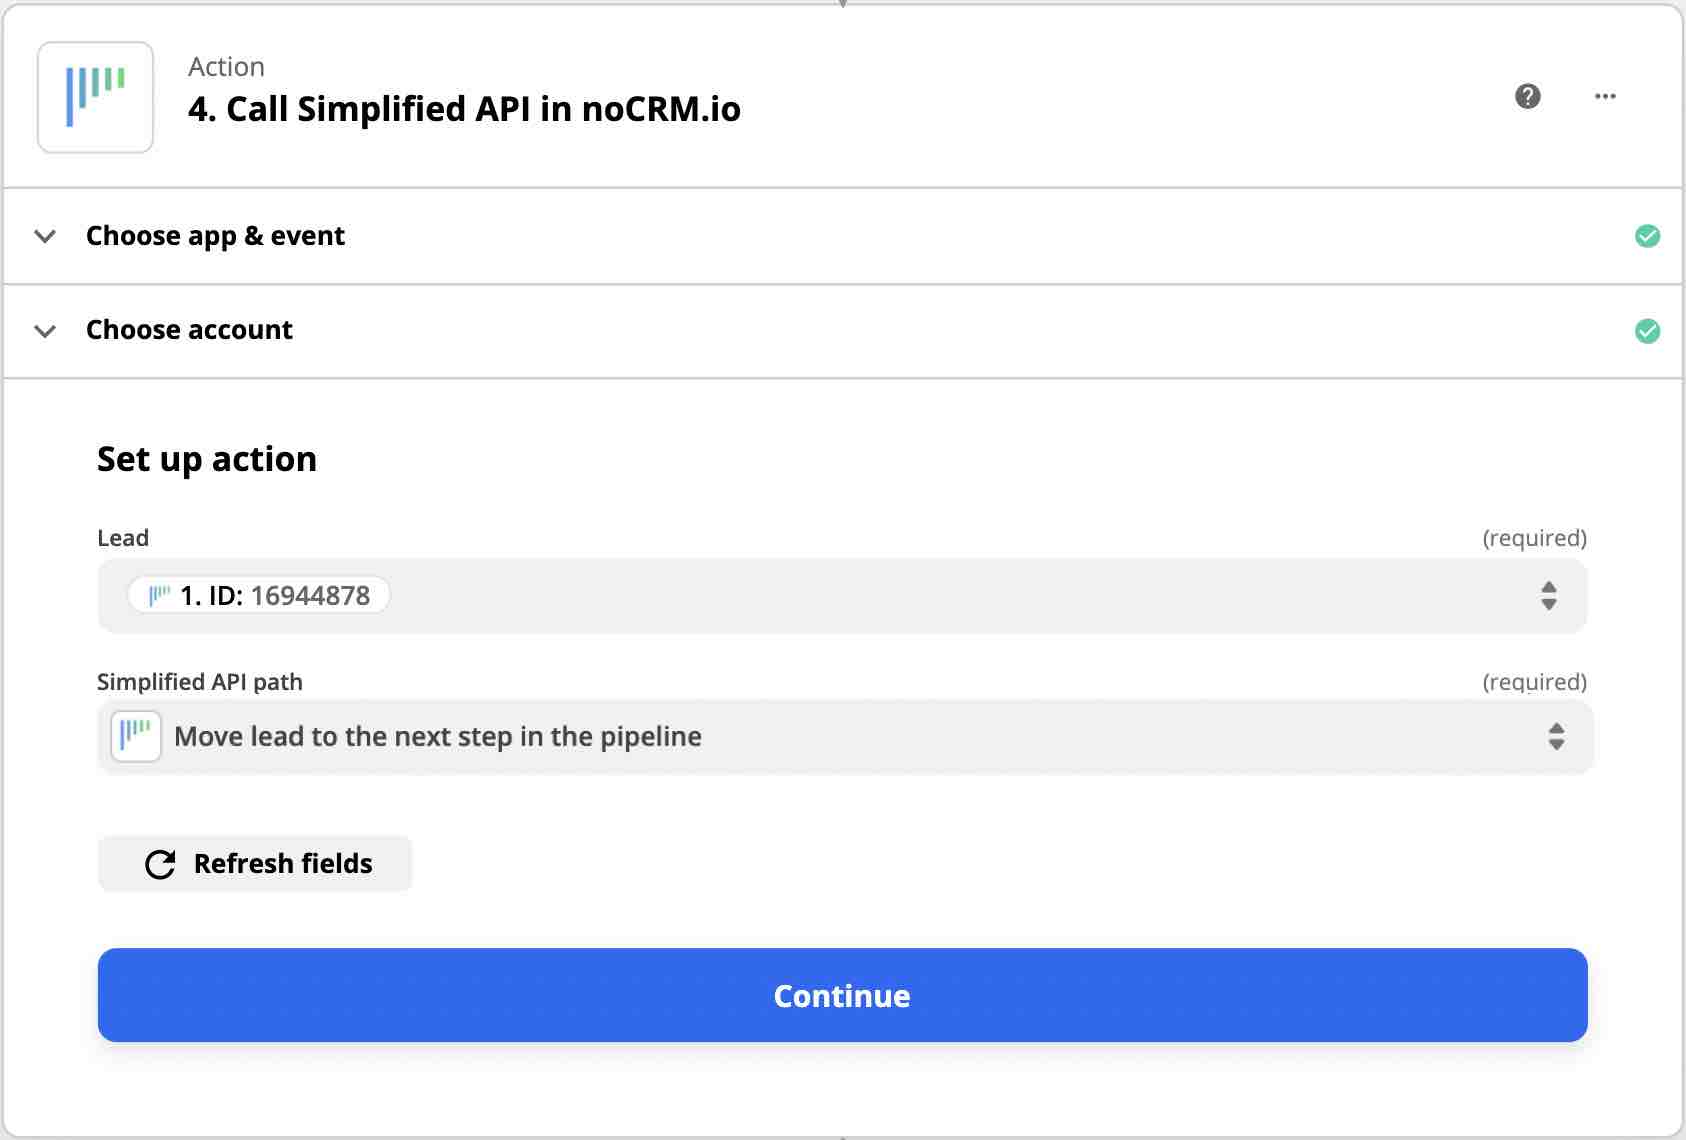
Once you test and review this step, add another Action by clicking on the plus icon shown at the bottom of the page.
You should be getting the hang of it by now. Select noCRM.io and choose the Action "Call Simplified API". You'll also need to set up the lead as we've done in the previous step then choose "Move lead to the next step in the pipeline" as your API path. Hit continue to test and you're done.
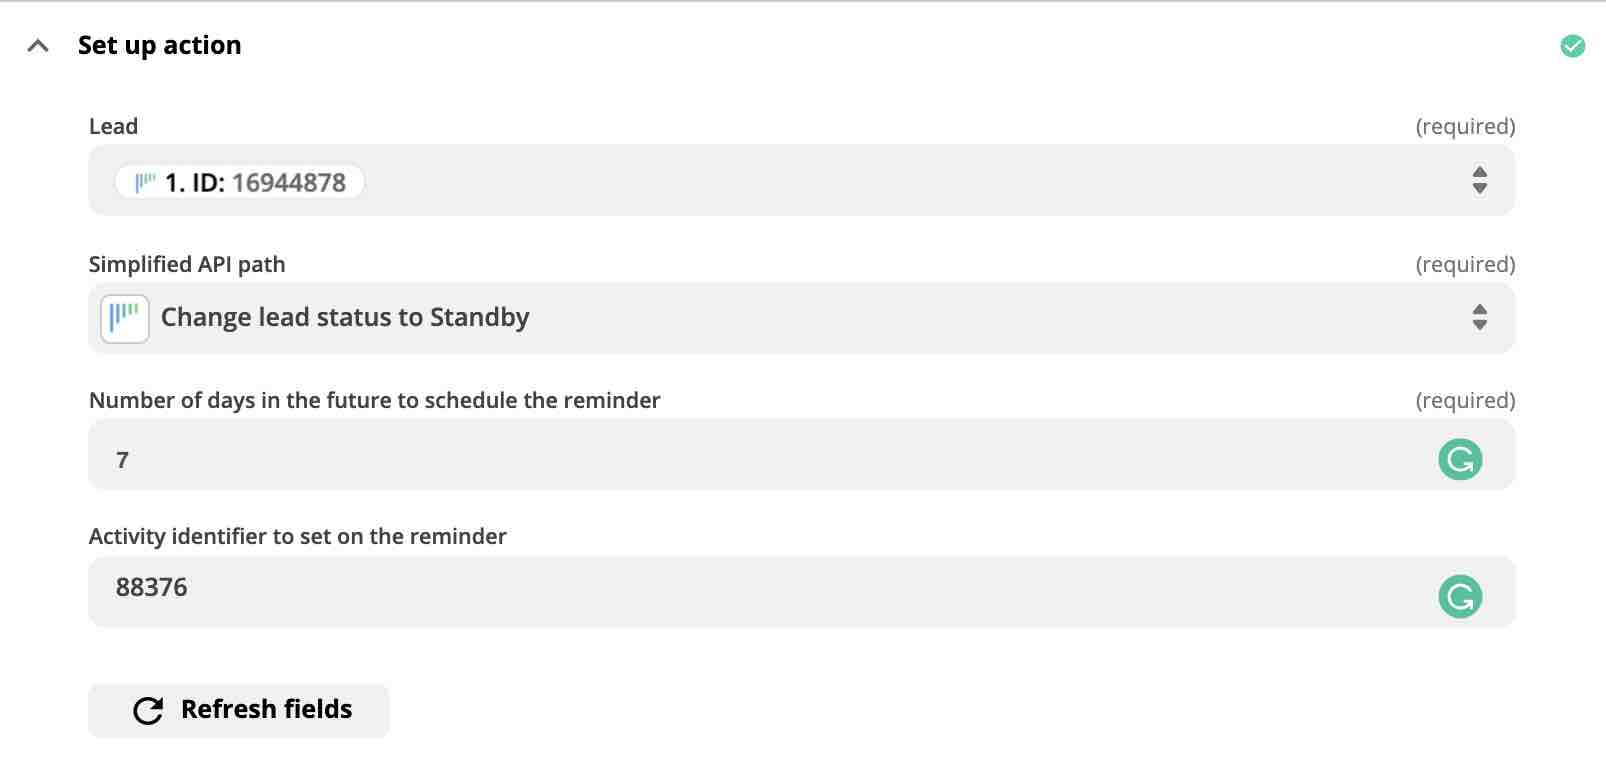
Now, on to our last Action: automatically setting up your next action for follow-ups!
After adding a new action and selecting "Call Simplified API", choose "Change lead status to Standby" as your API path.
After a couple of seconds, two more fields will appear.
In the first field, enter the number of days in the future you'd like to schedule the reminder for.
The second field is optional. If you'd like to set up a call, email, or any other custom activity you have in your account with this follow-up then can enter the activity ID.
Note: To find the Activity ID, go to Admin Panel > Integrations > API > Account Object IDs.
You've successfully completed automating this simple yet efficient process with Zapier.
Method two: Send leads a template email, then move them to the next step in the pipeline and set up a follow-up using Make with simplified API
Continuing on what we built in the previous tutorial using Make platform, click on the plus icon next to the second module to add a new one.
Choose noCRM.io again and select 'Make an API call' as your Action.
As a reminder, you can set up this module in two ways:
Method A
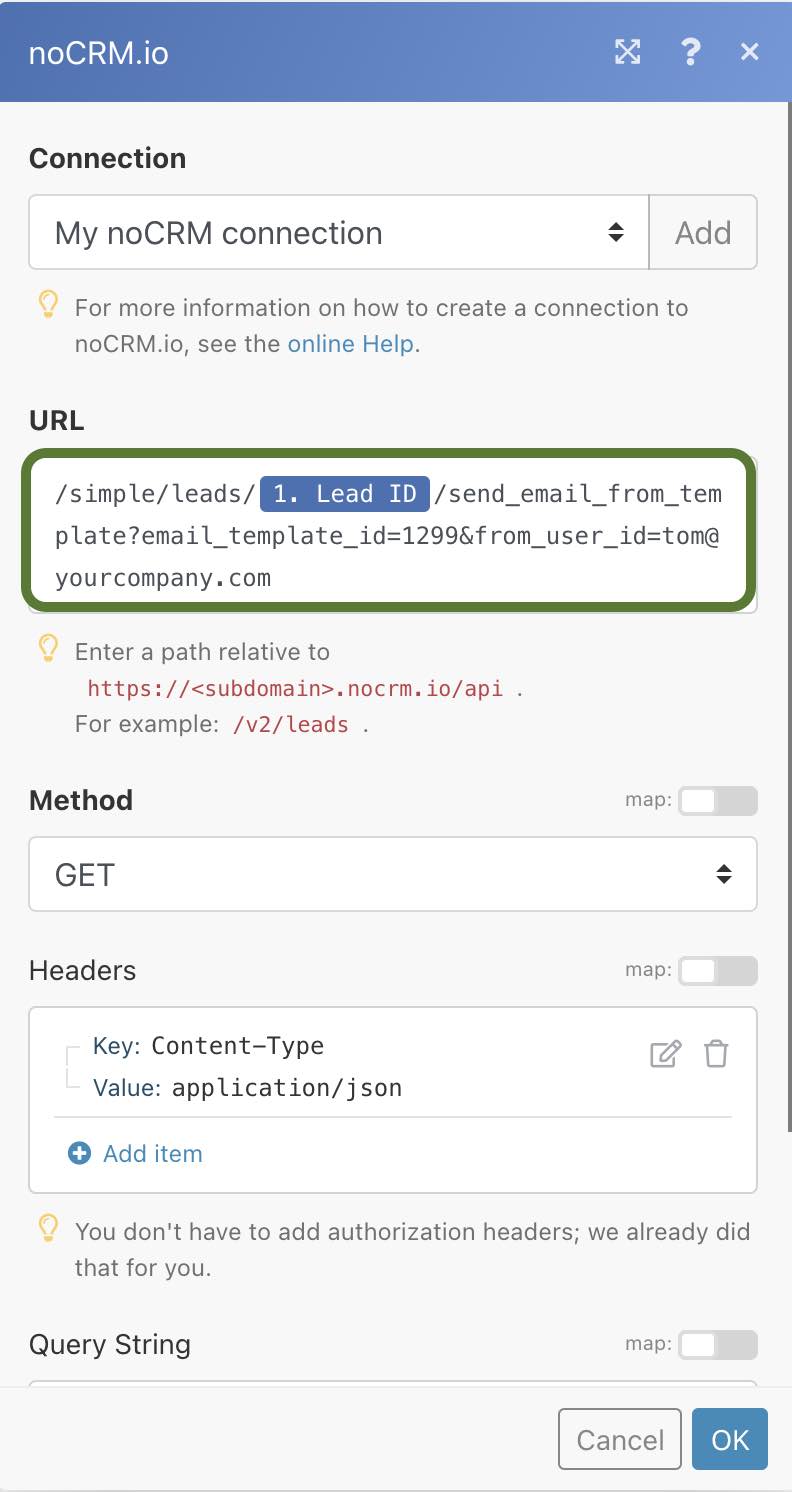
1- fill the URL field with the following:
/simple/leads/LEAD_ID/send_email_from_template?email_template_id=TemplateID&from_user_id=UserEMAIL
?Please ensure the following before using this URL:
1) Only shared templates can be used
2) There's an email address in the lead (Make sure the email address is in the right default field)
3) The sending user has synchronized their mailbox with their noCRM account
2- Replace LEAD_ID with the Lead_ID retrieved from the previous module.
3- Replace TemplateID with the template ID found in Admin Panel > Integrations > API > Account Object IDs.
4- Replace UserEMAIL with the user email address you'd like to send out emails from.
5- Choose the Method "GET"
Method B
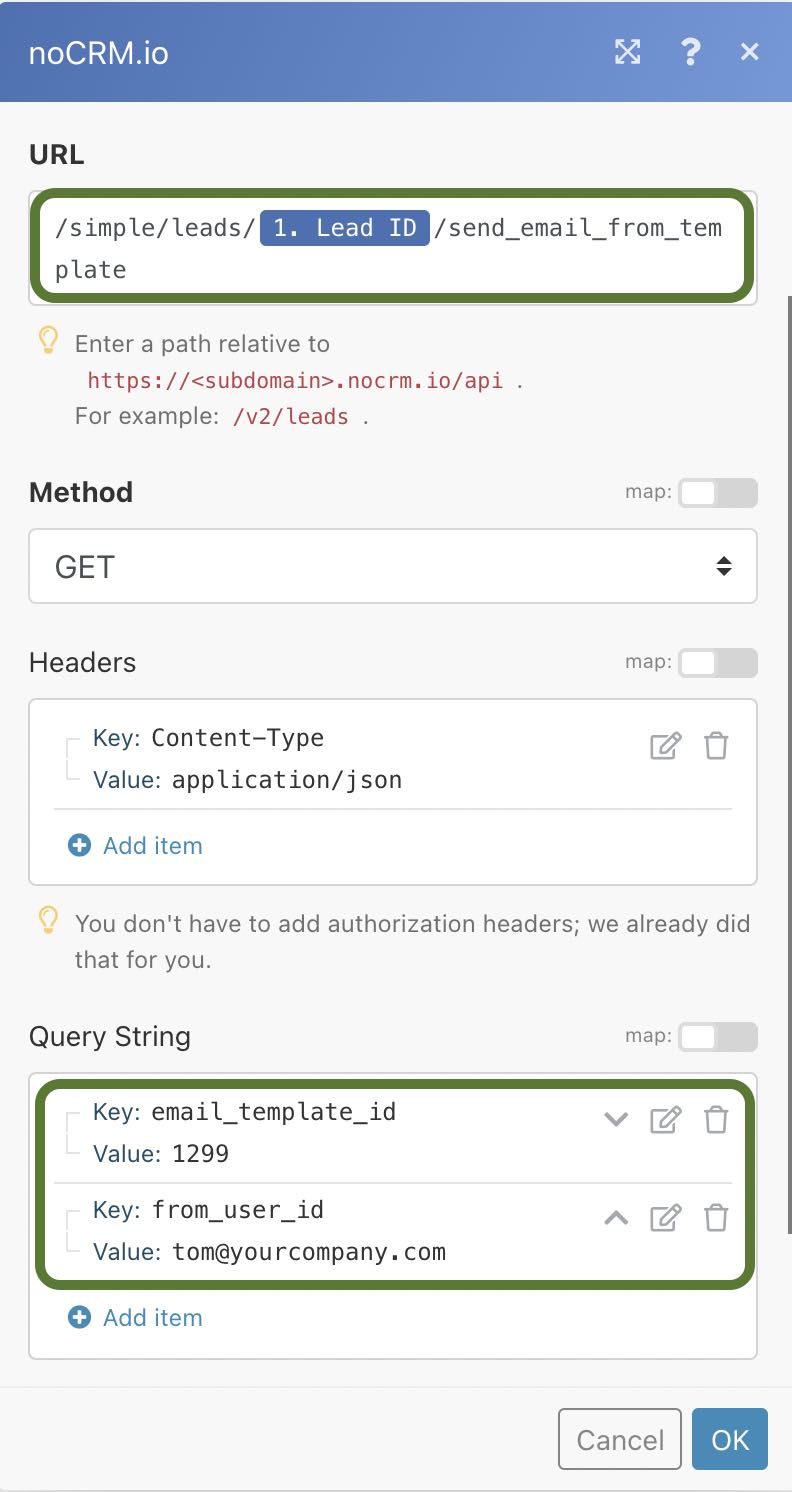
1- Paste this URL in the URL field of the module set-up:
/simple/leads/LEAD_ID/send_email_from_template
2- Replace LEAD_ID with the Lead_ID retrieved from the previous module.
3- Choose the Method "GET"
4- Edit the Query String by adding an "item". In there, enter email_template_id in the key field and the email template ID in the value field.
5- Adding an additional 'item' in the Query String. Enter from_user_id in the key field and the user email address in the value field.
The first method is easier and more straightforward. It's up to you to choose which one you prefer!
Next, create a new module, choose noCRM.io again, and select "Make an API call" as your Action. As we've previously set up the module:
1- fill the URL field with the following:
simple/leads/LEAD_ID/next_step
Again, do not copy and paste {Lead_Id}. Instead, choose Lead_ID from the first module.
2- Choose the method "GET".
Finally, let's set up the last module. Choose noCRM.io again and select "Make an API call" as your Action.
1- fill the URL field with the following:
simple/leads/LEAD_ID/standby?days=XX&activity_id=YY
This allows you to set up a scenario such as scheduling a call with the lead in 7 days' time.
Replace the XX with the number of days in the future you'd like to set your follow-up.
This step is optional, but you may also replace the YY with the activity ID you want to use.
Note: To find the Activity ID, go to Admin Panel > Integrations > API > Account Object IDs.
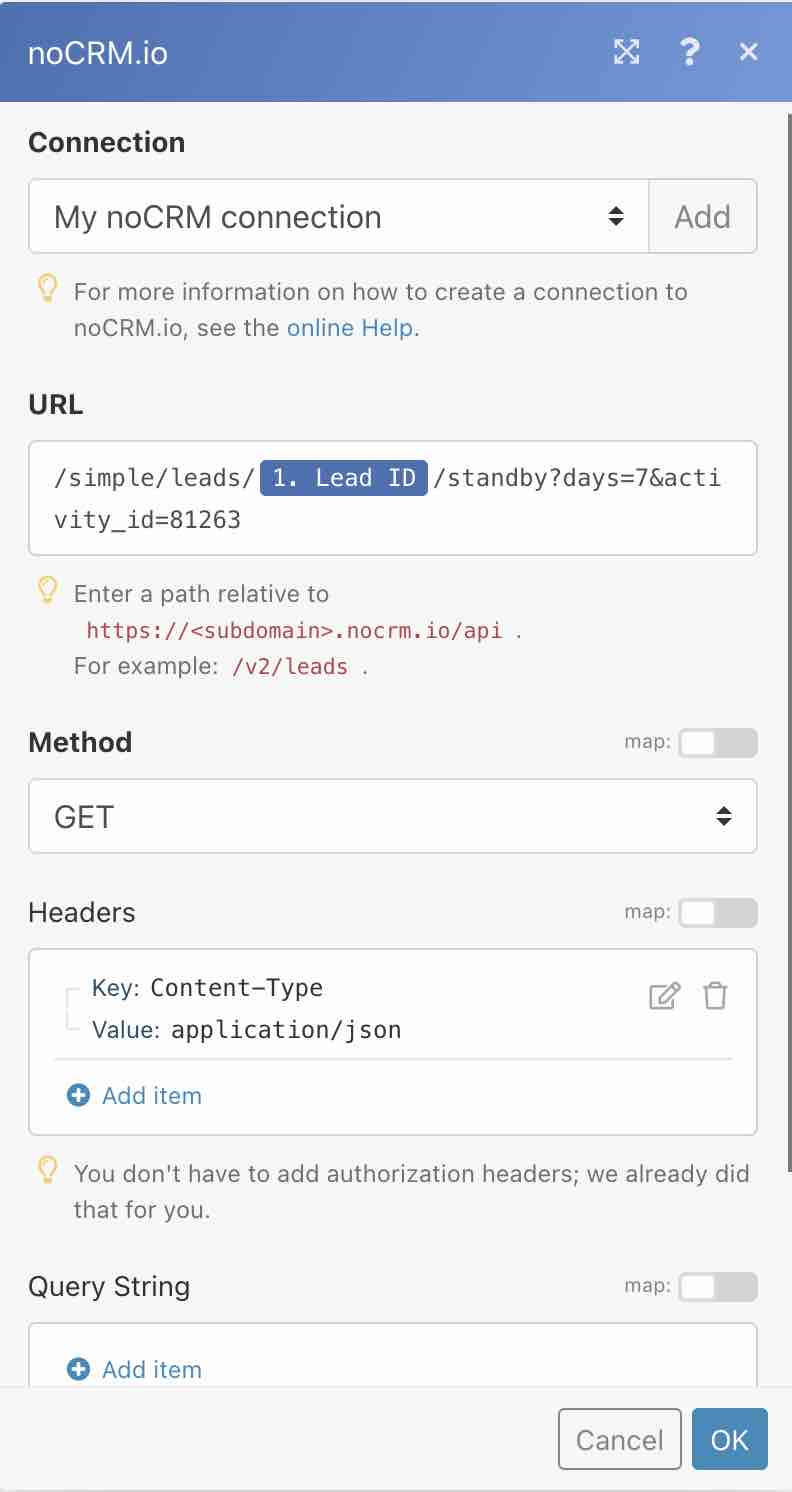
2- Choose the method "GET".
And you're done!
Now that you have the basics down, you may automate this process for your company or customize it to make it your own using either Make or Zapier!