Assign an incoming lead to a sales rep of your choice
This is our first tutorial. It is very simple but it's a real-life example of how to implement a useful no-code scenario.
When an unassigned lead comes from an external source, such as a website form, into your noCRM account, you might want to have it automatically assigned to a specific user so they start working on it directly.
The goal of this workflow is to assign incoming unassigned leads to a user of your choice.
Note: There are a few ways to get a no-code app to identify which user you want the lead to be assigned to, but in this tutorial, we will use the user's email address.
As an example, we're going to do this using four different methods:
The last two methods, with the simplified API, are useless in this case as the correct Action already exists in both Zapier and Make. However, it will help you understand how to build more complex workflows when it's not natively possible with the two platforms.
Method one: Assign incoming leads to a sales rep of your choice using Zapier
Zapier is easier for creating a simple scenario so we're going to get started with this method.
You'll first need to have a Zapier account. If you don't have one yet, sign up for a free trial.
In Zapier, you create Zaps. Zaps are a bridge between apps that start with a trigger in the first app that launches an action in the second app.
Step one
Let's start with creating our first Zap and connect noCRM.io with noCRM.io.
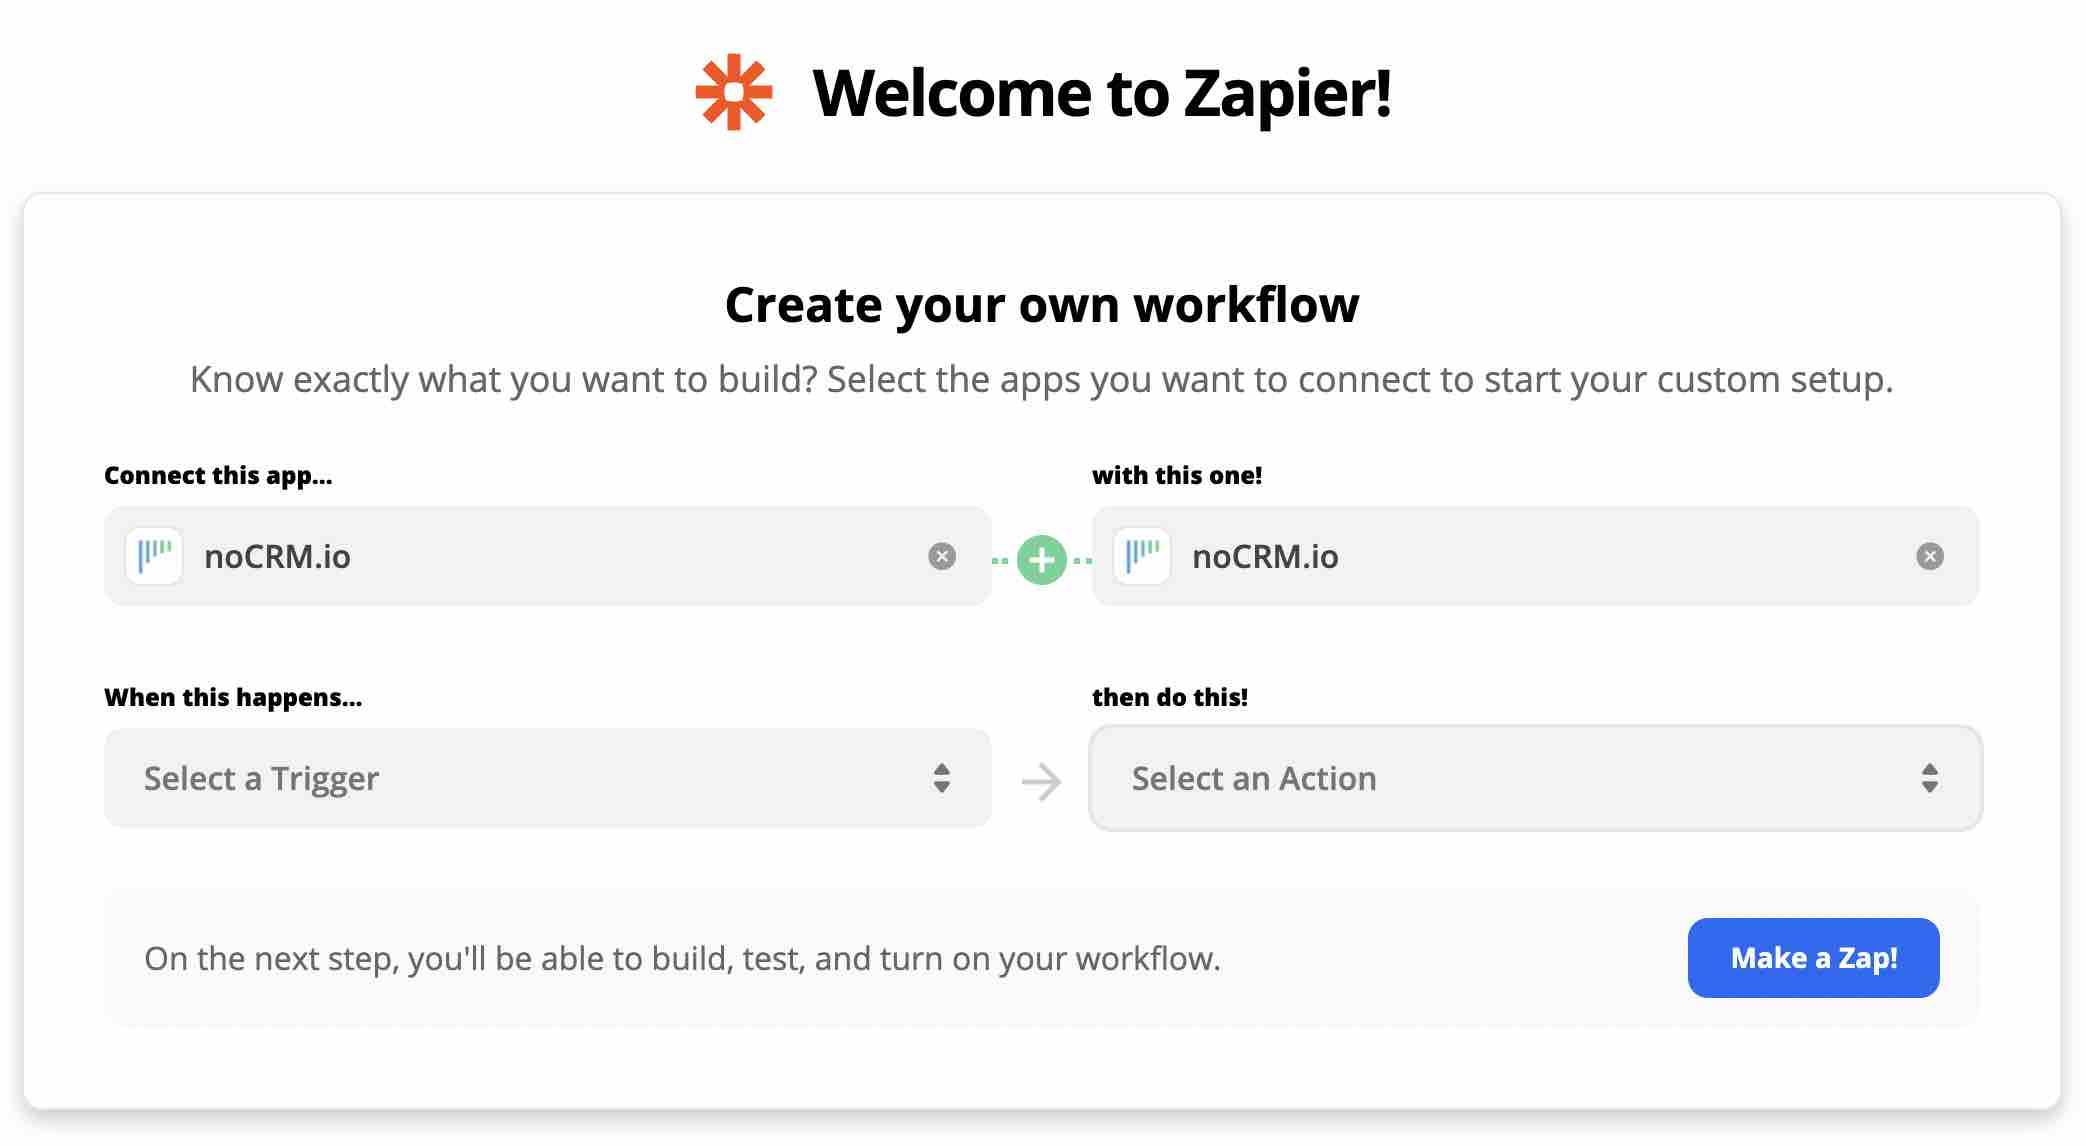
Following the "When this happens then do this" concept, Select the trigger "New unassigned lead" and the action "Assign lead". 'Try it' and Make a Zap!.
Step two
The next step is to connect your noCRM.io account.
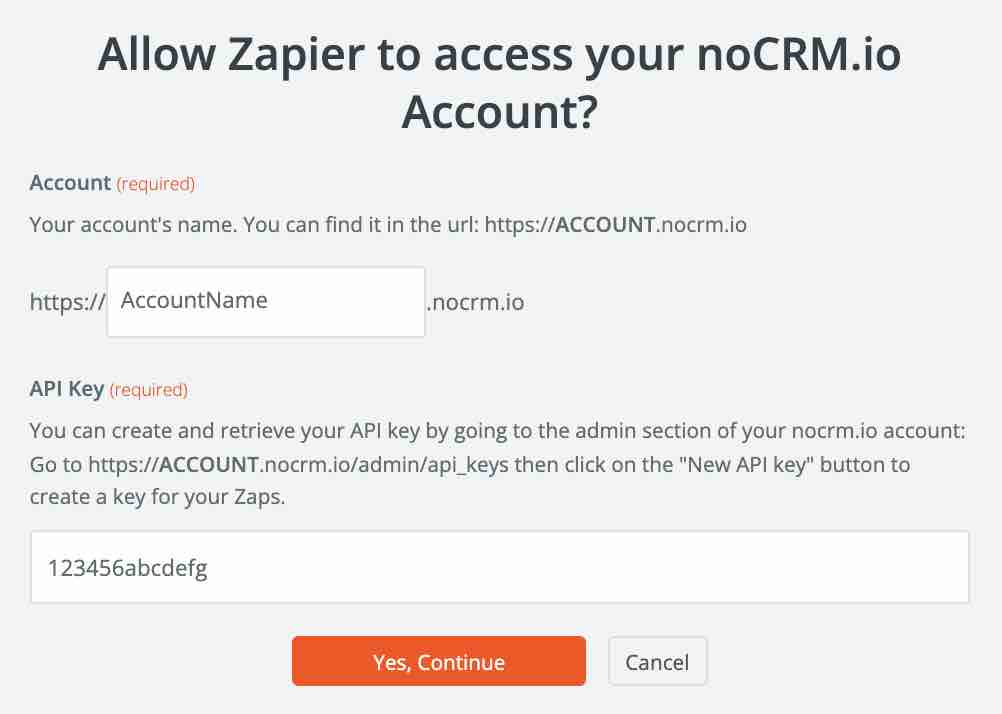
In the new pop-up, you'll need to enter your noCRM account name/subdomain and an API key.
For this step, go to your Admin Panel in noCRM > Integrations > API > API Keys and 'Create an API key'.
Continue to name the trigger (optional), and test it!
Step three
Next is setting up your Action.
Your Action event is already pre-selected as "Assign Lead".
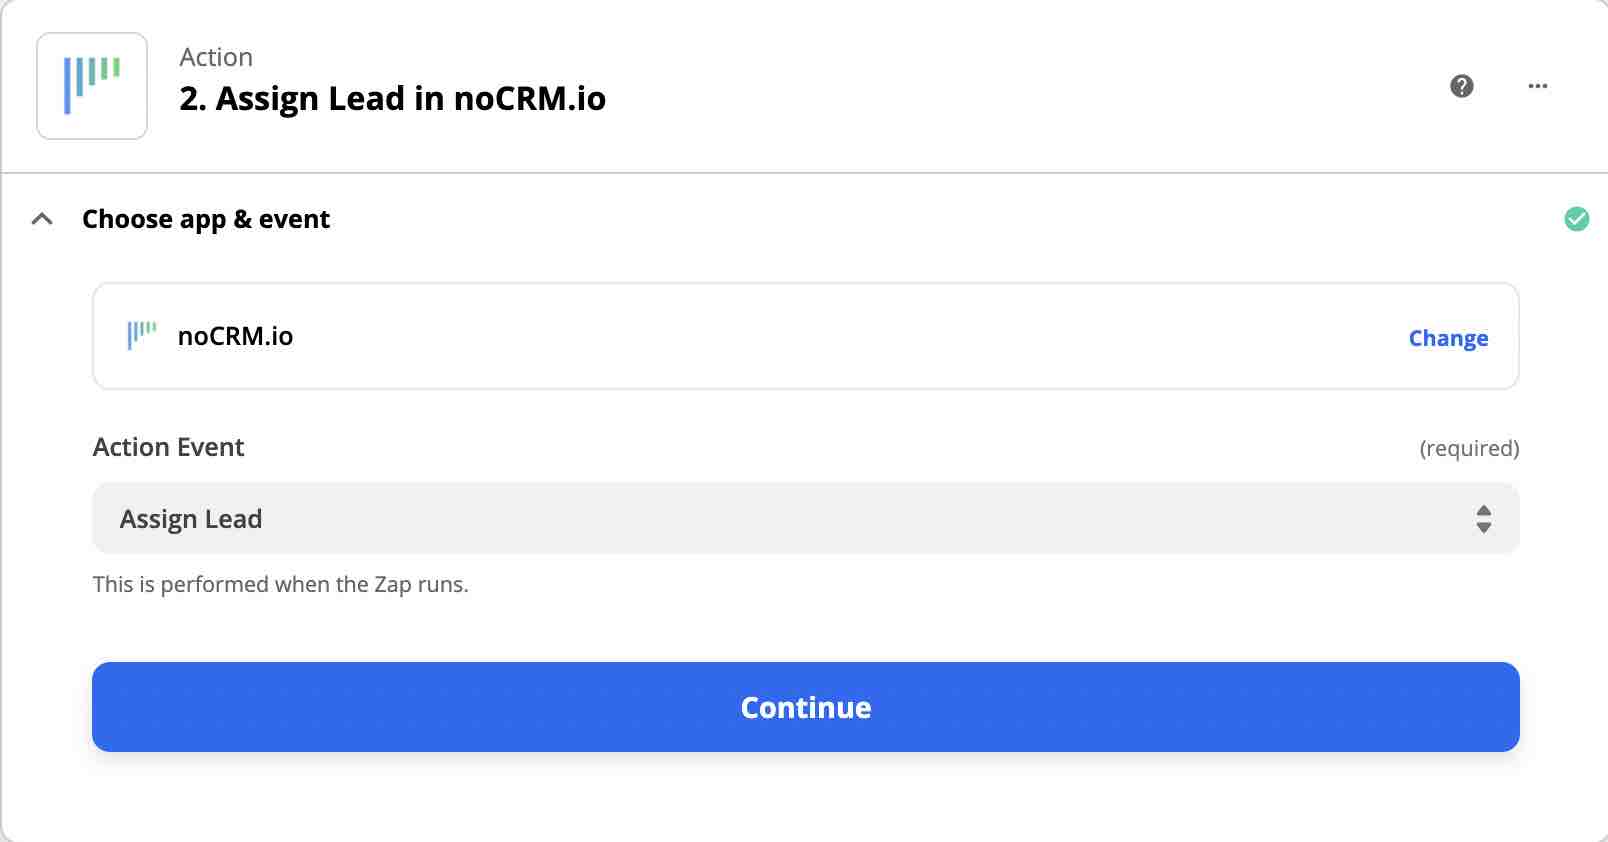
Choose the account you've connected to earlier and continue to set up your Action.
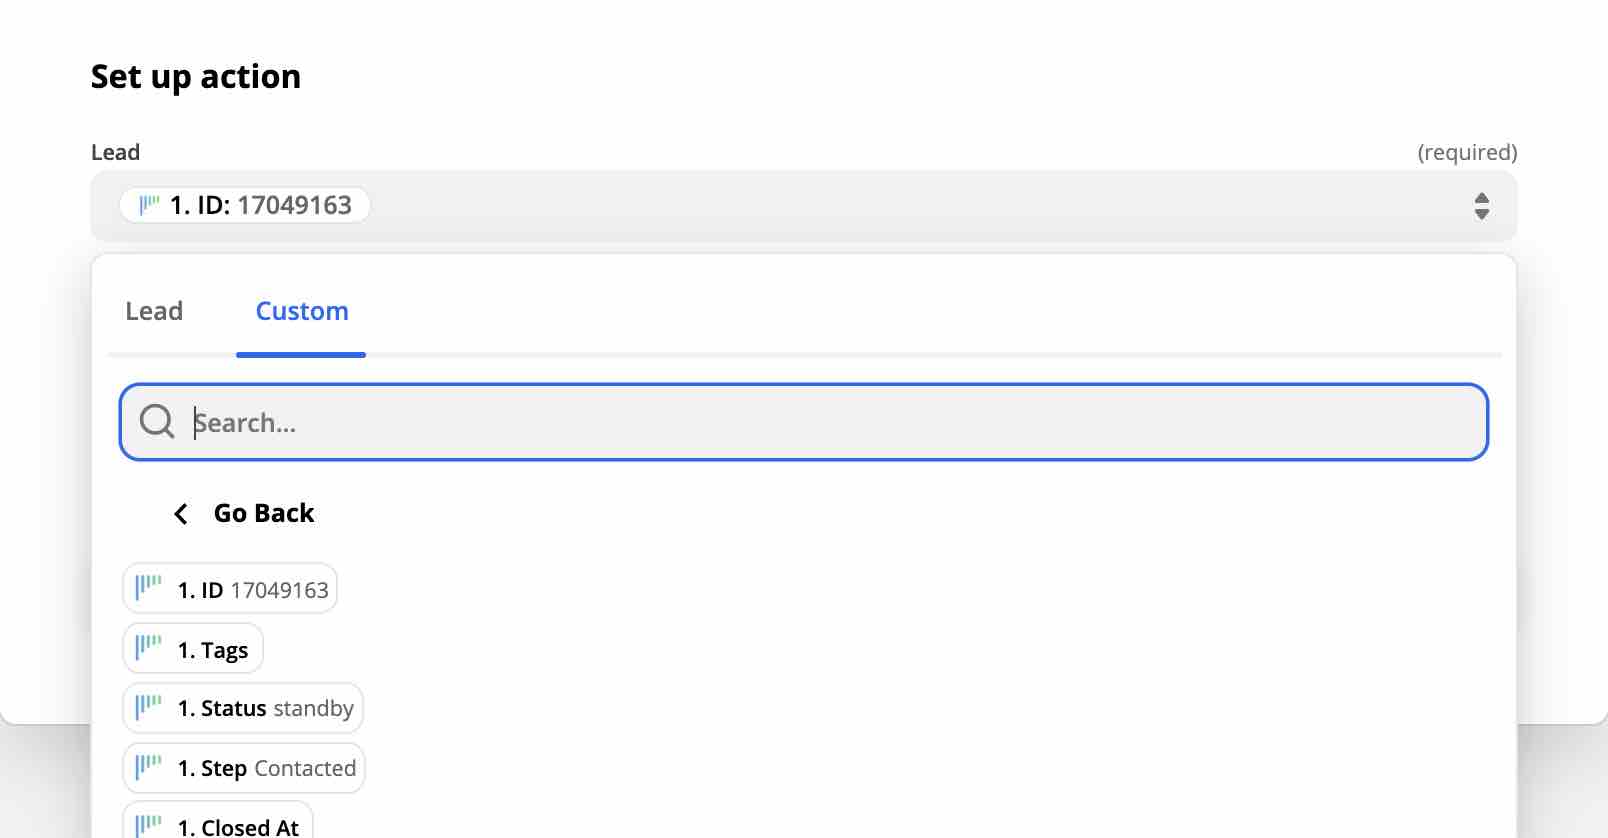
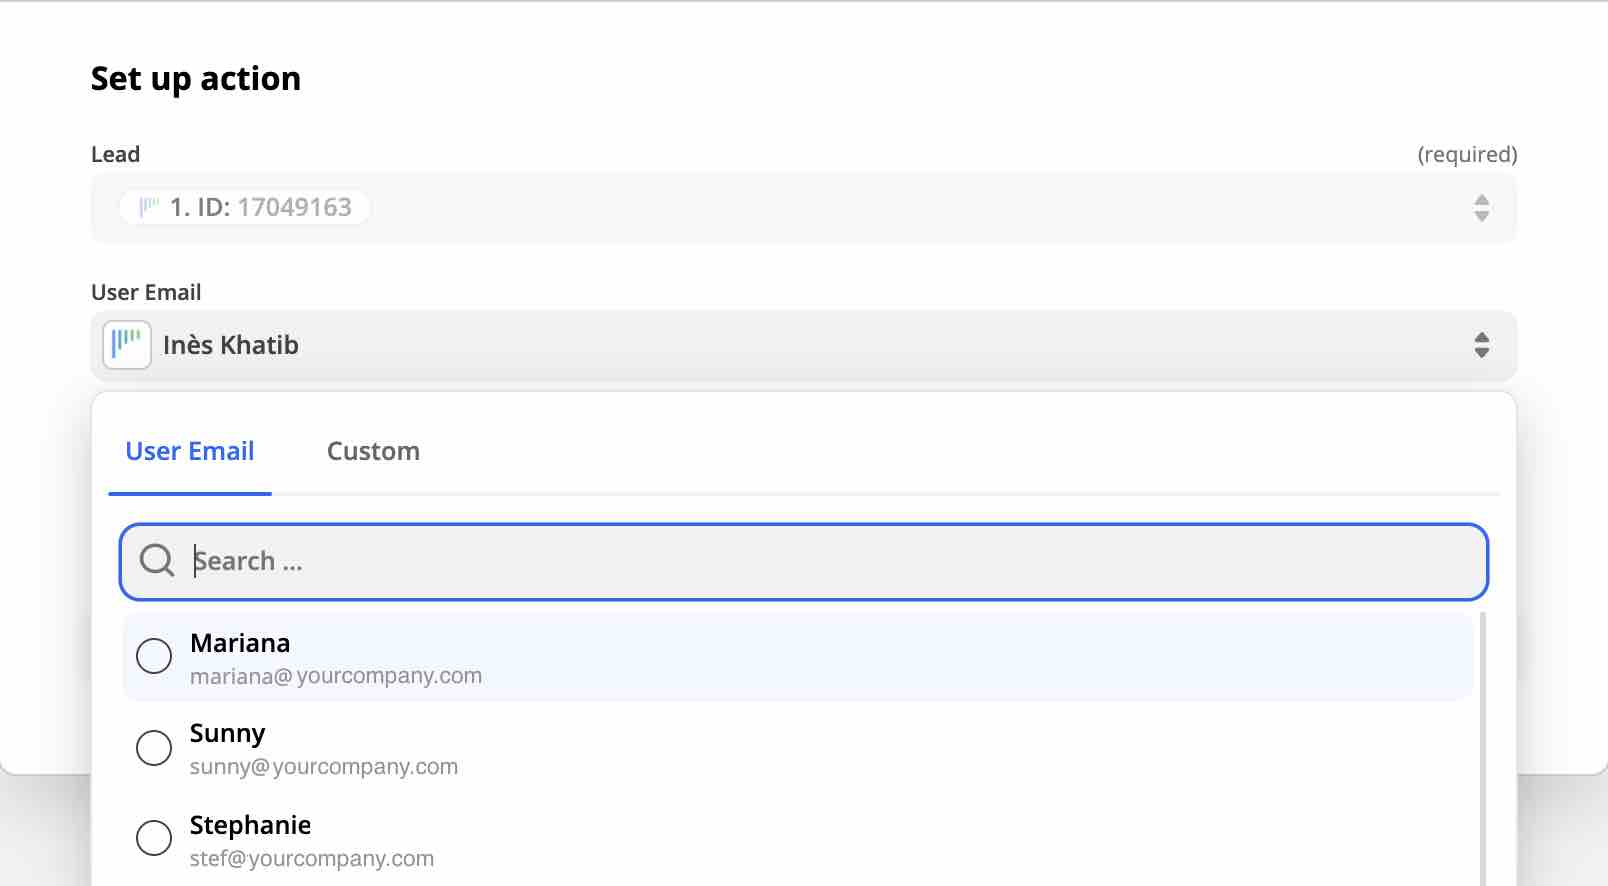
You must first correctly set up the Lead field so that Zapier knows from where to retrieve the lead that you'd like to assign. Choose the Custom tab in the Lead value, select noCRM.io, and then click on the lead that was generated in the Trigger step. This ensures that it doesn't take the same lead you've just tested each time, instead, it will assign the new unassigned lead coming in from the first step.
Lastly, you must set up the User Email value. You can simply choose from the dropdown list the email address of the user you want the lead to be assigned to.
Test and continue to turn on the Zap!
Now every time you have a new unassigned lead, Zapier will automatically assign it to that user you've selected!
Method two: Assign incoming leads to a user of your choice using Make
Now let's do the same thing but with Make.
You'll first need to have a Make account. If you don't have one yet, sign up for a free trial.
In Make, you create Scenarios. Scenarios are connections between apps that start with a trigger module in the first app that launches an action module in the second app.
Step one
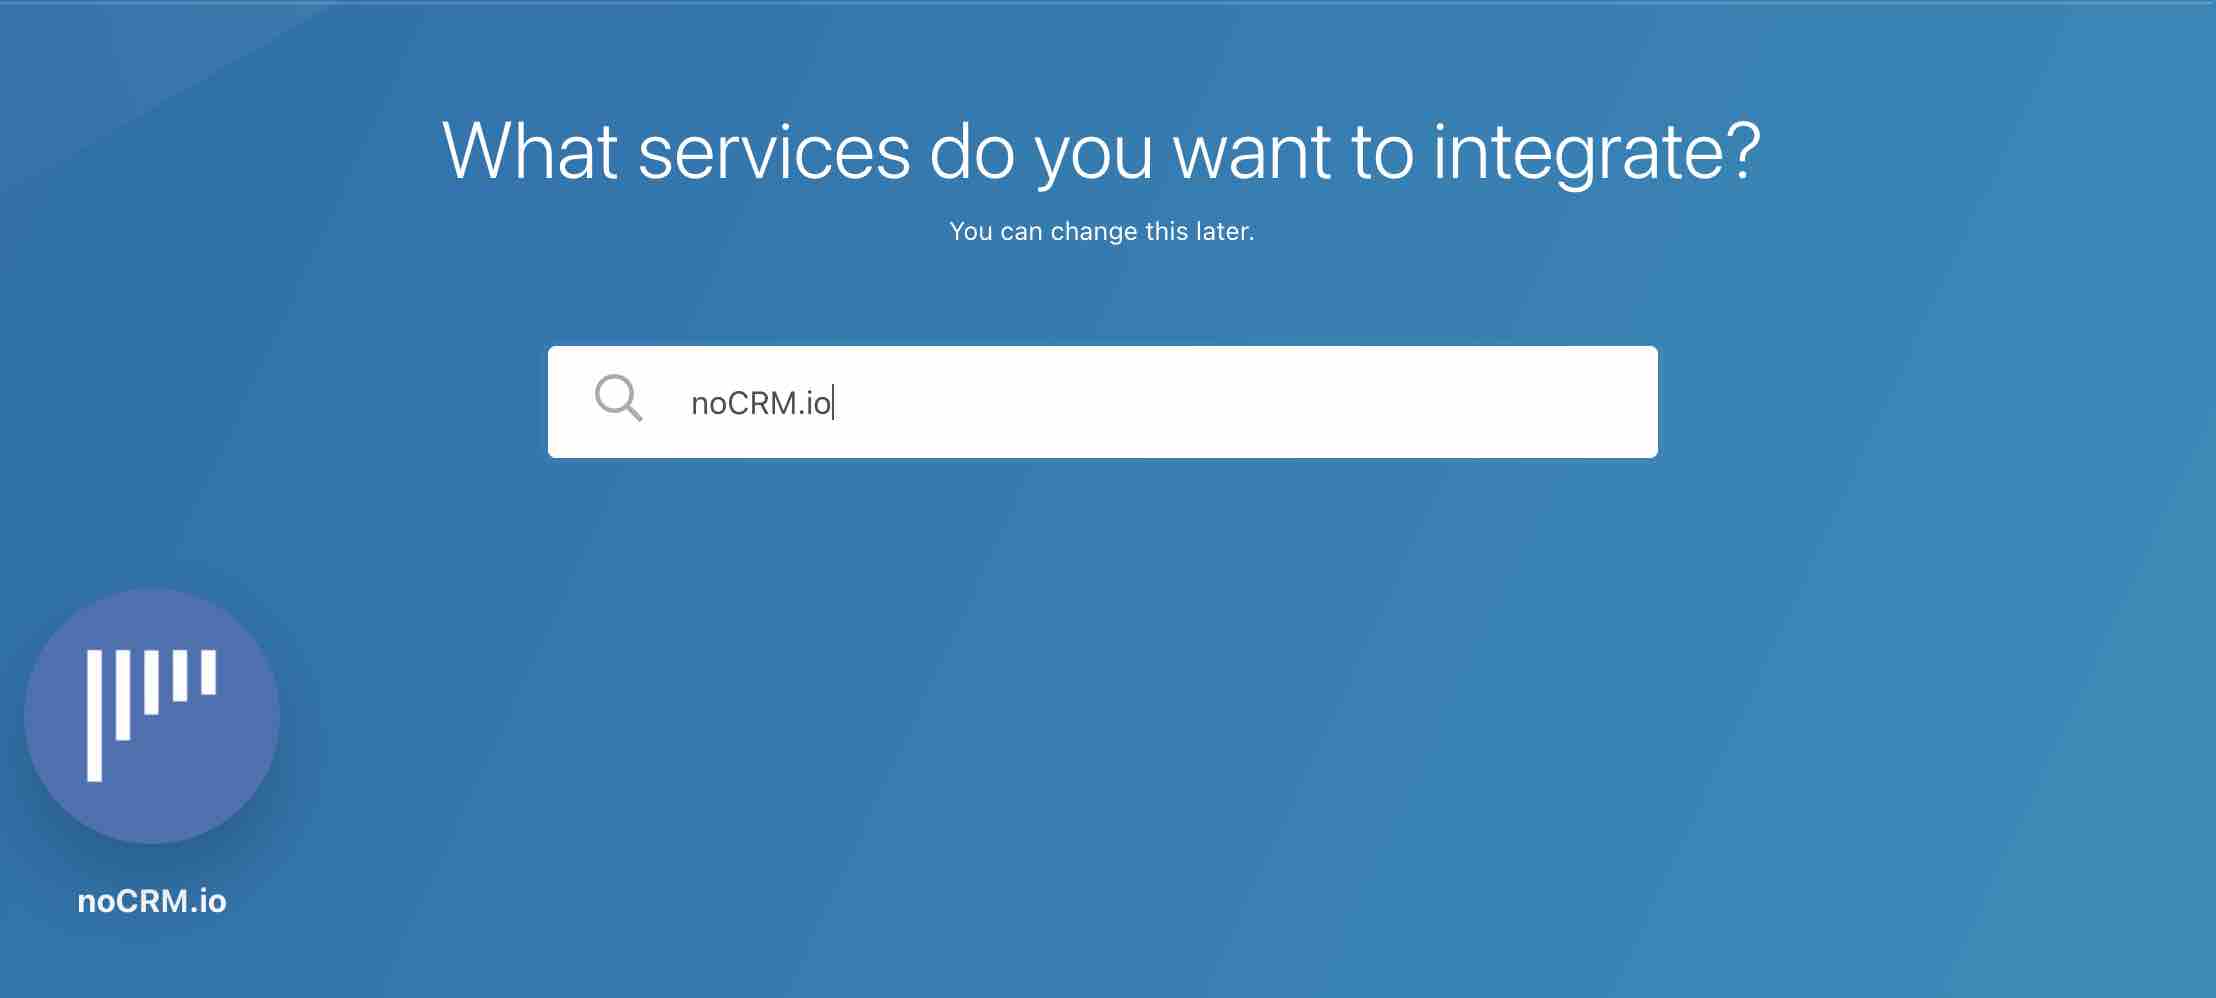
Let's get started by creating a new scenario in Make.
Use the search box to find noCRM.io to integrate and click 'Continue'.

Click on the created module and choose noCRM.io. You will then see a dropdown list of Triggers Make supports in noCRM. For this tutorial, choose 'Watch Unassigned Lead Created' and click on the 'Add' button. This instructs Make that every time there's a new unassigned lead created in your noCRM account, it should trigger this scenario.
A new box will appear where you can 'Add' a new connection. This is where you need to connect noCRM to Make.
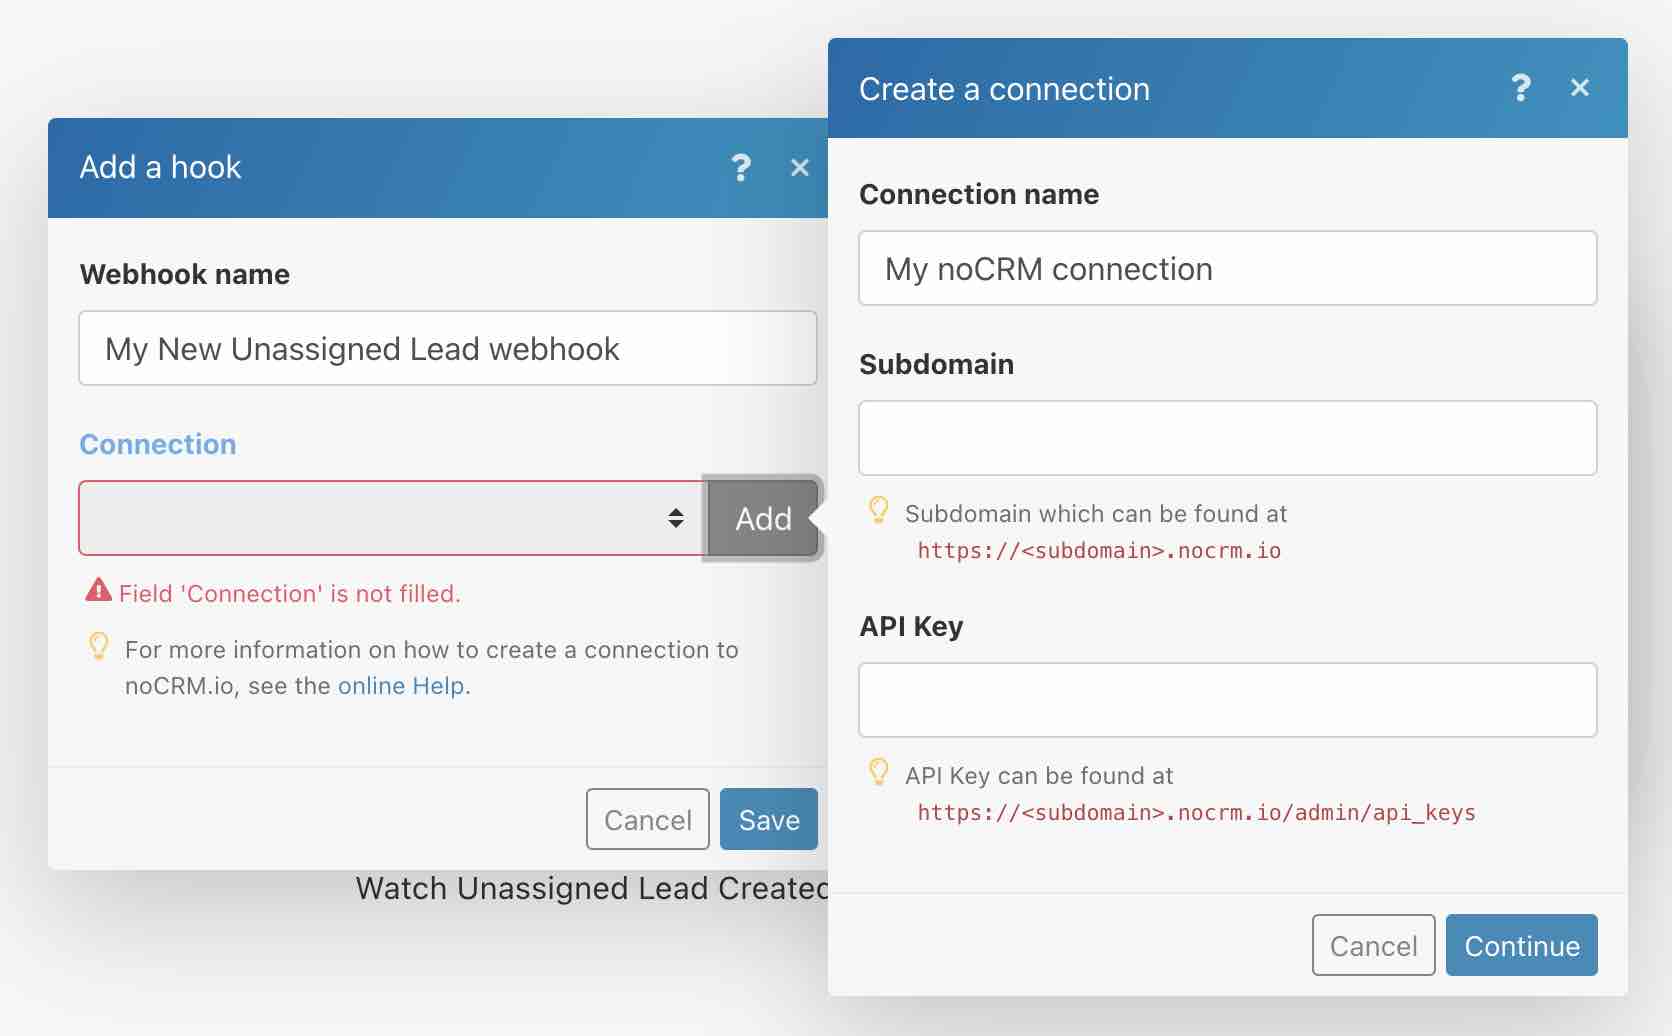
Plug in your account name/subdomain in and the API key in the last field.
For this step, go to your Admin Panel in noCRM > Integrations > API > API keys and 'Create an API key'.
Step two
Next is adding a new module by clicking on the '+' icon. Choose noCRM.io again and pick "Update a Lead" as your Action. We want to update the lead by assigning it to a user of your choice.
Now it's time to set up this module:
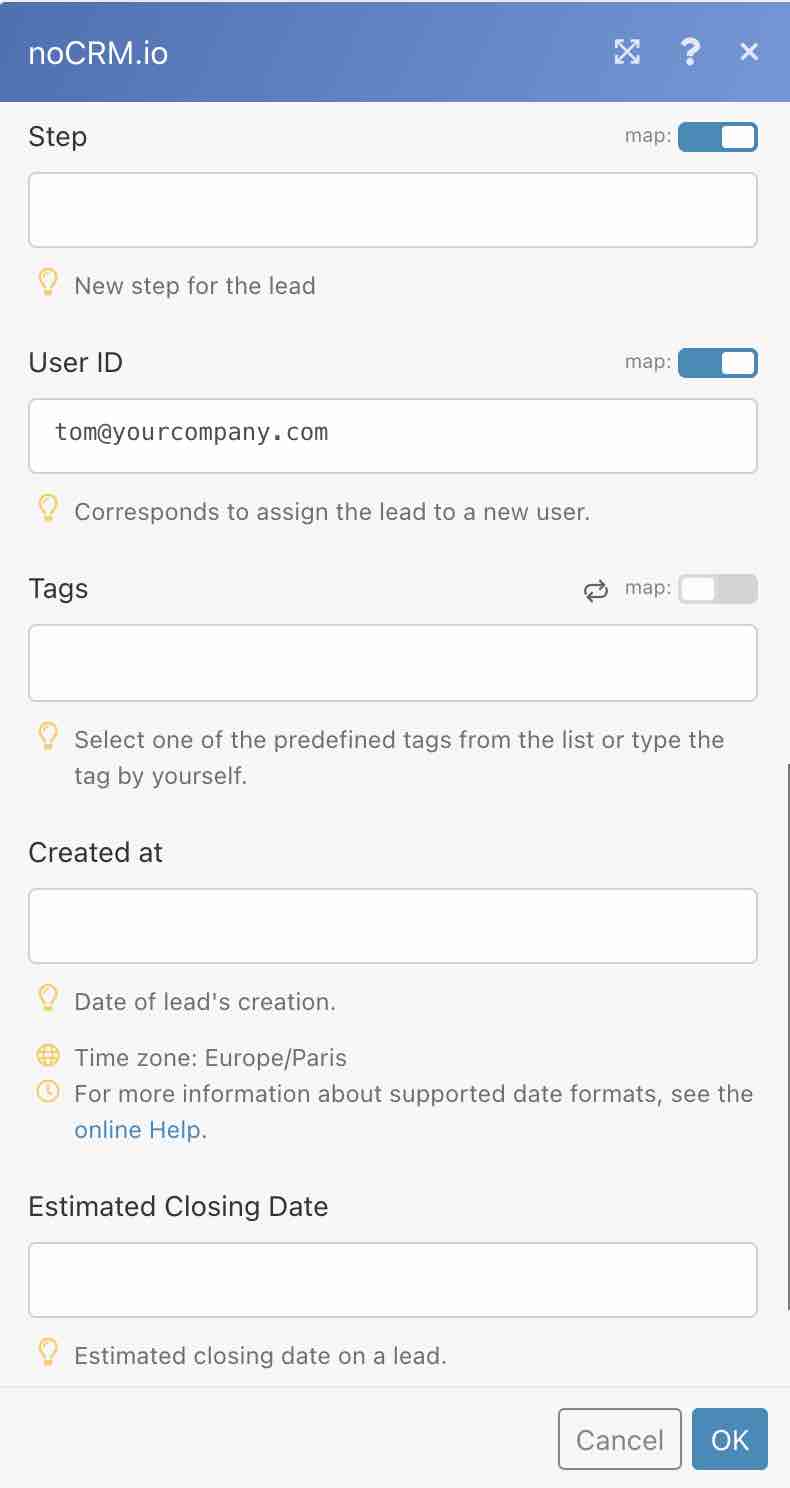
1- Select Lead ID from the previous module in the Lead ID field. This instructs Make that it should update the unassigned lead that's been retrieved in the previous module.
2- Add your choice of noCRM user by entering the user email address into the User ID field.
Run the scenario to test it and turn it on in the Scheduling section on the bottom.
You can now have all new unassigned leads assigned to the user you selected in your noCRM account with the help of Make!
Method three: Assign incoming sales leads to a rep of your choice using Make with simplified API
Next, we can run the same scenario using a combination of Make and our simplified API. As noted at the beginning of this article, for this example, this tutorial is not useful as the action already exists natively in Zapier and Make. However, it serves as an example to understand how to create a workflow if an Action doesn't exist in either platform.
In Zapier, you create Zaps. Zaps are a bridge between apps that start with a trigger in the first app that launches an action in the second app.
Step one
Let's get started by creating a new scenario in Make.
Click on the created module and choose noCRM.io. You will then see a dropdown list of Triggers Make supports in noCRM. For this tutorial, choose 'Watch Unassigned Lead Created' and click on the 'Add' button. This instructs Make that every time there's a new unassigned lead created in your noCRM account, it should trigger this scenario.
A new box will appear where you can 'Add' a new connection. This is where you need to connect noCRM to Make.
Note: If you already added a connection to your Make, you can skip this section.
Plug in your account name/subdomain in the 'Subdomain' field and the API key in the last field.
For this step, go to your Admin Panel in noCRM > Integrations > API > API Keys and 'Create an API key'.
Step two
Next is adding a new module by clicking on the '+' icon. Choose noCRM.io again and pick 'Make an API call' as your Action. Now it's time to set up this module:
There are two ways to set up this module:
Method A
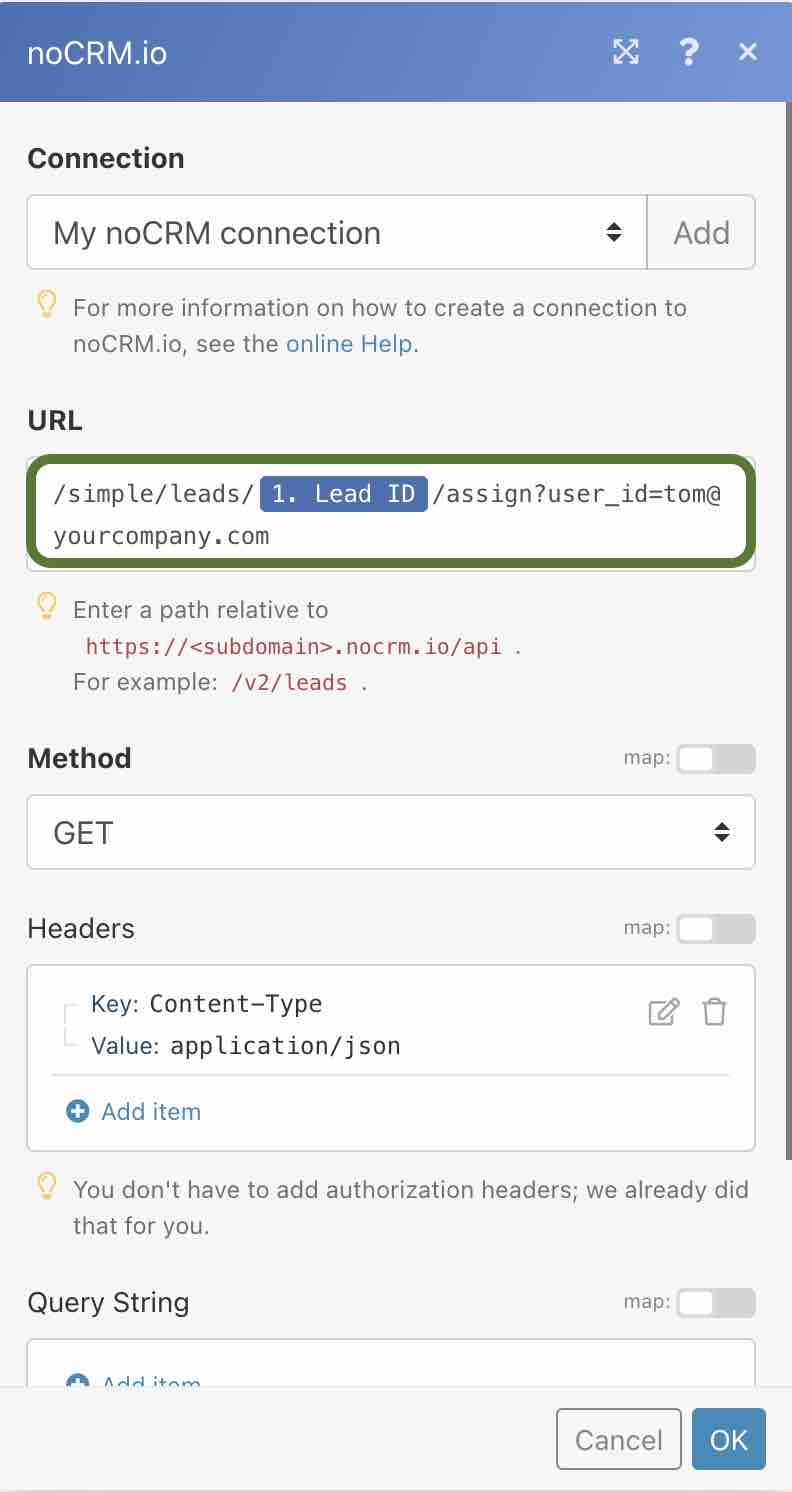
1- fill the 'URL' field with the following:
/simple/leads/LEAD_ID/assign?user_id=UserID
2- Replace LEAD_ID with the Lead_ID retrieved from the previous module.
3- Replace UserID with the user email address.
4- Choose the Method "GET"
Method B

1- Paste this URL in the URL field of the module set-up:
/simple/leads/LEAD_ID/assign
2- Replace LEAD_ID with the Lead_ID retrieved from the previous module.
3- Choose the Method "GET"
4- Edit the Query String by adding an 'item'. In there, fill in "user_id" in the key field and the user email address in the value field.
The first method is easier and more straightforward. It's up to you to choose which one you prefer!
Run the scenario to test it and turn it on in the Scheduling section on the bottom.
Method four: Assign incoming sales leads to a user of your choice using Zapier with simplified API
Lastly, we're going to create the same workflow with Zapier and the simplified API.
Following the steps of the previous Zapier tutorial, once you've successfully set up your Trigger, you can move on to setting up your Action.
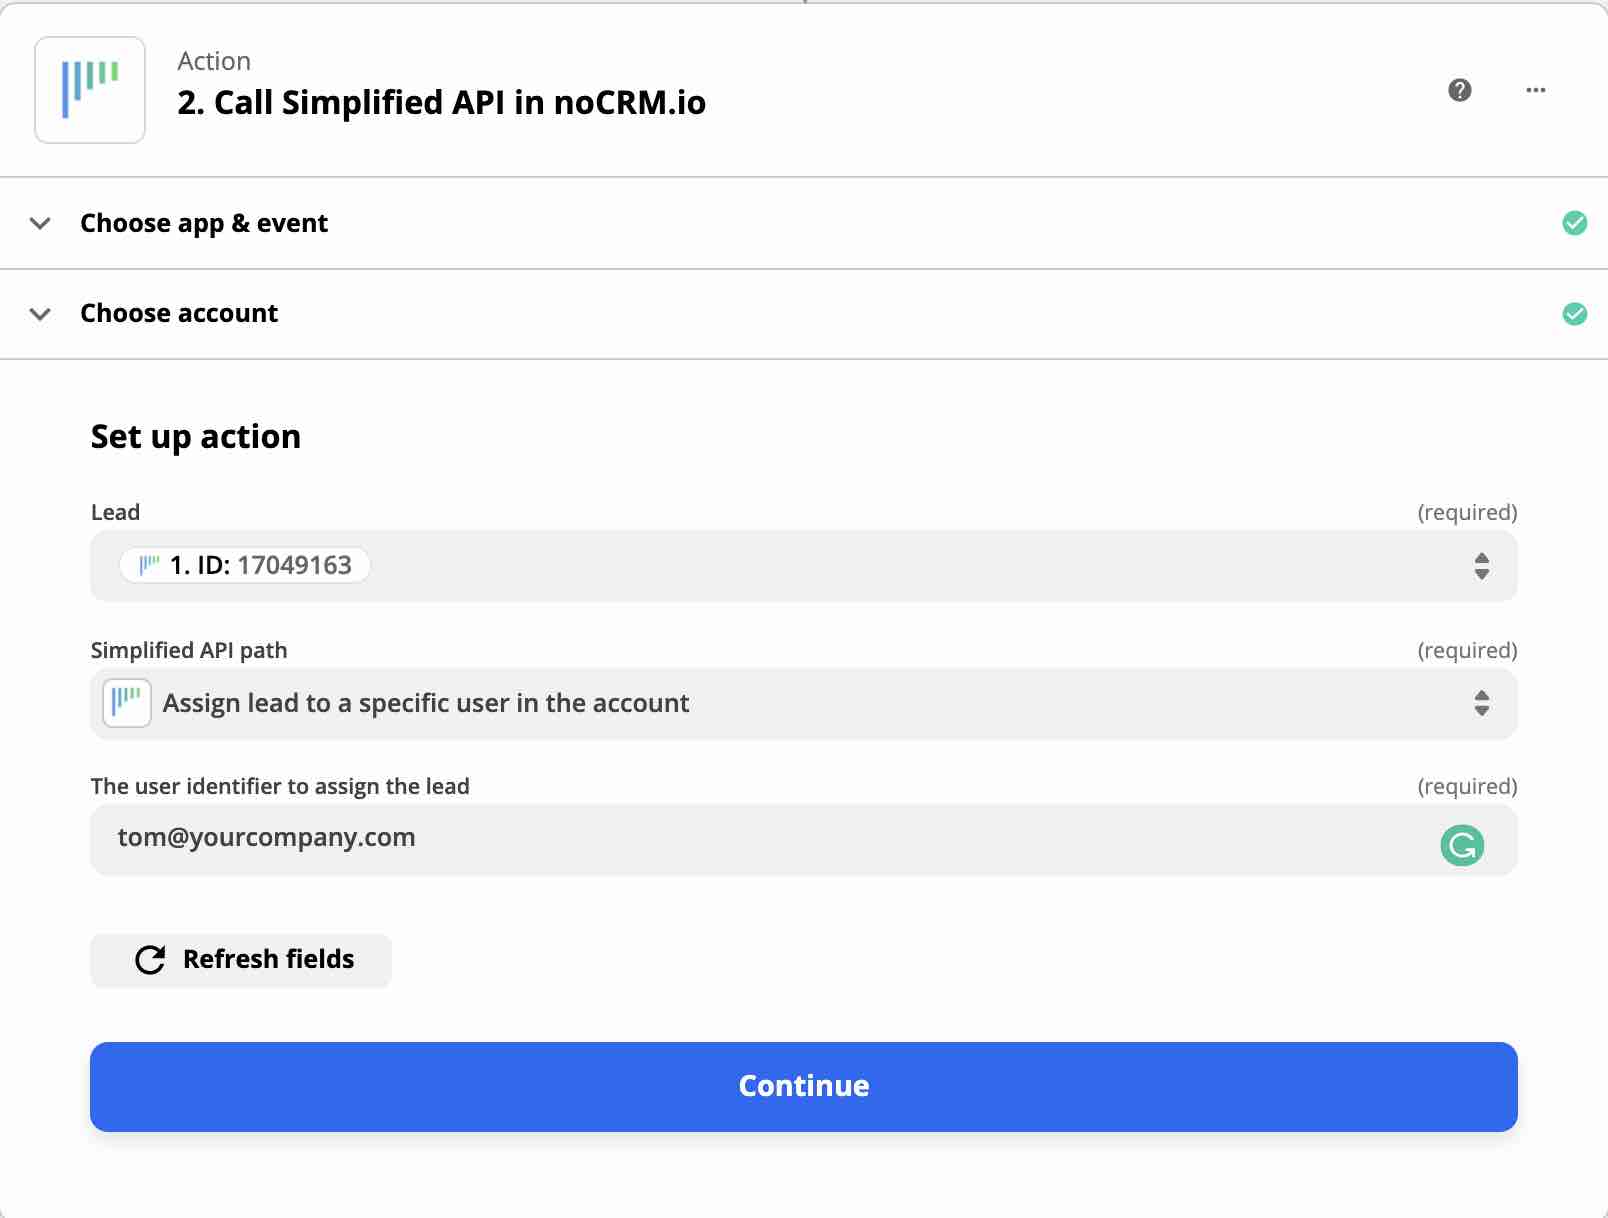
Choose noCRM.io again as your event app and choose the Action "Call Simplified API". Once you're there, choose the API path "Assign lead to a specific user in the account".
All that's left for you to do is to enter the lead ID (click on the Custom tab and choose the lead ID retrieved from the first step) and the user email address you want the leads to be assigned to.
You've now learned how to make your very first workflow using our direct integration with Zapier and Make. You've also learned how to create no-code workflow automation using simplified API when an Action doesn't exist in either of the integration platforms.
To summarize, here's what you've learned:
- How to connect noCRM to Zapier or Make
- What is a Zap, a trigger, and an Action in Zapier
- What is a scenario, module, connection, and JSON tools in Make
- How to use our simplified API
- How to build automations in noCRM.io
Next up, we're going to add another layer of customization to this automation.