Introduction
Let’s face it : Google Apps Marketplace is actually a bit messy. It is stuck in the middle of a transition from an old Marketplace to a new shiny one. We hope the new Marketplace will be the start for a great experience and will allow Google to drive the huge echo system of app developers it deserves, around its business applications.
Developing an app for the Marketplace is quite confusing, not because it is difficult itself but because documentation is spread out in different places and several contradictory versions of the existing help. In the “old” Google Apps Marketplace (v1) the authentication process was done using a 2-legged OAuth1, this authentication mode is now deprecated. All the new apps must now use OAuth2.
The aim of this tutorial is to give you a complete HowTo of the full process of how to create a new web based application for Google Apps with offline access to some of the Google APIs. At the end of this tutorial there is a section on how to move your old Google Apps Marketplace v1 app, to the new apps Marketplace (OAuth2 based).
The examples here are written for Ruby on Rails but even if you use another language they should help you a lot. This post is very long but we think it’s worth it (at least we would have been very happy to have it ;-).
The Google documentation on how to build an app for the Marketplace can be found here: https://developers.google.com/apps-marketplace/ but it’s a light documentation, and if you’re reading these lines you probably already know about it.
Who are we?
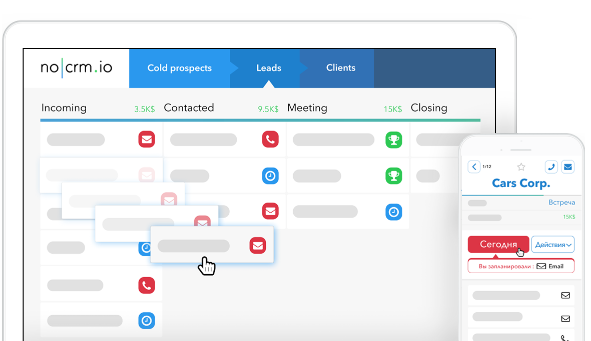
We are an international startup with presence in the USA, London, Paris and São Paulo. We develop a SaaS application called You Don’t need a CRM! which allows sales people to track and close their deals without wasting time filling-in forms. This article is brought to you by our CTO Stephanie and our CEO Sunny (@noryus).
What are we talking about?
There are a lot of different interfaces, names and authentication methods that generate a lot of misunderstandings in the process of creating an app so we’re going to try to clarify things:
- The old Google Apps Marketplace: https://www.google.com/enterprise/marketplace/
This Marketplace will probably be revamped in the future but today (april 2014) this is the old Marketplace. You cannot add any new app to this Marketplace; you can just upgrade your app to the new Marketplace (if you already have a listed app there). The old Marketplace uses 2-legged OAuth1 for authentication which is now deprecated. - The Chrome Web Store: https://chrome.google.com/webstore/
THIS IS NOT the new Marketplace, but apps in the new Marketplace just look exactly like apps on the Chrome Webstore. The Chrome Webstore is (at least actually) more oriented to personal users with a Gmail account than to users of Google Apps for Business. - The new Google Apps Marketplace:
As we are actually in the middle of nowhere, there is no real website for this new Marketplace. The only way to access it, as an administrator of a Google Apps for Business domain, is by adding some apps from the Marketplace. To see apps from the new Marketplace (for example ours) go to admin.google.com, identify yourself, click on Google Apps Marketplace, then click on the small icon on the top right of the screen to “add an app”. Then you can scroll the list until you find a good app (let’s say ‘You do not need a CRM’ 😉 and add it. What we are going to deal with here is how to add an app to this list so that domain administrators can install it. - The Google Developer Console: https://cloud.google.com/console
It’s from there that you’re going to create your app. - The Google API SDK: (You access it through your console)
From there you’re going to declare and setup which API you’re going to use in your App. - The Chrome Webstore Developer Dashboard:
Even if you don’t want to publish your app to the Chrome Store (as explained above) you will need this dashboard to publish it to the Marketplace. (Remember that apps from the new Marketplace are presented exactly like a Chrome Store app)
What are the minimum requirements for my app to be eligible to the new Marketplace?
You only need to implement 3 things:
- Authentication must be on OAuth2
- You must at least allow a user to connect to your service through the Google universal navigation bar
- You must provide a one-click SSO experience to users, which means that only the domain administrator should be prompted for granting the right to access personal information. Individual users inside a domain should not be prompted and should be connected seamlessly to your app when the click on your app name through the Google navigation bar.
You can of course implement connections with other Google APIs but this 3 points (all about authentication) are the only ones that are required. Failing on one of these will not allow you to be listed in the Marketplace.
Will it cost me money?
Yes. It will cost you 105$: 5$ for the Chrome store developer account and 100$ for the validation of your app in the Marketplace.
Now we have presented all the elements we can dive into the tutorial itself.
Tutorial
1. Create your application in the Google Developers Console
First you have to create a project.
- Go to the page: https://cloud.google.com
- Login with your Google account
- You arrive on the Google Developers Console
- On the left you have a Projects menu. You should arrive directly on this menu, if not click on it.
- Click on Create project button

A new window appears, where you have to enter your project’s name and a project id.

When the project is created, you arrive on the console of your project.

On the permissions tab, you can see the members who can access and/or edit the content. You can add the members of your team to be able to access to the application and set their permissions: can view, can edit, is owner.

2. Enable needed API
The next step is to enable the APIs you need for your project.
On the left menu, click on APIs & auth menu item.
A list of APIs appears and you have to enable/disable the ones you need.

A few APIs are very important to enable:
- Google Apps Marketplace SDK: this API allows you to configure your app and be able to install it
- Google+ API: this API allows you to get the information of the user connected like the names,..
- Add all the other APIs you need but do not add API you’re not going to use.
3. Configuration GoogleApps Marketplace
In the API list, click on the settings icon close to the GoogleApps Marketplace SDK. You are redirected to the “old” Google API console. On this page you have to enter all the information concerning your app: Name, description, icons and the terms of service.
Then you have to enter the scopes.
By default you have 2 scopes for the email and the profile of the connected user.
If you want to access other information, you have to add the scopes. The scopes can be found for each kind of data in the Google documentation (the oAuth playground is a great place to find API scopes: https://developers.google.com/oauthplayground/). Be careful to find the scope of the URL to access the data, use the minimum you can as each scope will generate a line in the popup of the sign-in process of your customers. Keep also the list of the scopes in a file because you will need it later.
In our example, as we have added the contacts and the calendar, let’s add the 2 scopes. You should have something like that:

Notes
- Even if you have added the API, you need to add the specific scopes for the data you want to access.
- If you need to add new scopes afterwards, a few minutes are necessary before you can actually test them. It is not very long, but long enough when you are testing.
In the extension part, to have your application in the application launcher of the emails, you have to check the Universal Navigation Extension and add the URL which goes to your application for login purpose.

Note: If you need more explanation on the extension, you can follow the Google documentation https://developers.google.com/apps-marketplace/preparing.
Save your changes at the very bottom of the page.
4. Fill in the Consent screen
Go back to the new console, https://cloud.google.com/console, and click on the left, on APIs & auth, then on Consent screen menu. Fill in all the information needed to have a nice Consent screen for your new users.
5. Create your credentials
Go back to the new console, https://cloud.google.com/console, and click on the left on APIs & auth then on credentials menu.
Click on the button Create New Client ID and select web application. Fill in the fields javascript origins and redirect_uri depending on your project (in practice you might not use the javascript origin). You will have to create 2 client IDs, one Web application and one Service Account.
Concerning the redirect_uris, for testing purposes, it is important to add one with localhost. If you do not do that, you will have the following error when starting the exchange with Google:
Invalid parameter value for redirect_uri: Non-public domains not allowed

After you click on Create, in the credentials panel of your console, you will have all the information needed: Client ID, email address, client secret, redirect_uris and javascript origins.
Now we will create the service account id. Click on the button Create New Client ID and select Service account.

After clicking on the create button a key file .p12 will be downloaded. Keep this file as you need it to connect. Google doesn’t keep the key, so if you lose it, you will need to generate a new key.
The password for this key file will be displayed on the window. For now, for all the keys the password is ‘notasecret’. You will need it when using the p12 key file.

You will have 3 parameters with this service: client id, email address, private key finger prints and the file you downloaded.
6. Install your application for testing
You have to go to APIs & auth then APIs and click on the settings of the API GoogleApps Marketplace SDK. On the top of this console, close to the App ID, you have a button “Test install flow”. By clicking on this button, you will install your application. By the same time you will grant the access of data you specified earlier.
Note: if you add new scopes after installing the application and granting the access, it may not ask to grant the new ones. If this is the case, you have to delete the application in your domain administration panel and re-install it.
7. Login with oAuth2
Now that you have configured the application, got all the keys needed and installed your application from the Google console, we can start the authentication process.
There are many ways to do that. You can build the URL like in the documentation https://developers.google.com/accounts/docs/OAuth2Login.
Or you can use gems like oauth2 or google-API-ruby-client. You can use them independently, according to your goal and needs.
For the authentication we used the gem oAuth2 ( https://github.com/intridea/oauth2 ) to retrieve the user information in order to connect him/her to their account.
Principle of the authentication:
- Ask a request to Google with your client information, scopes and redirect_uri
- Google returns a code
- Exchange this code for an access_token
- Use the access_token to access the information you need
The code is written in Ruby and we use the Ruby on Rails framework.
In your controller, let’s start by the index method. It will be our access point to start the login process:
def index
  client = OAuth2::Client.new("client_id from the web application", "client_secret from the web application", {:site => "http://localhost:3000", :authorize_url => "https://accounts.google.com/o/oauth2/auth"})
  redirect_to client.auth_code.authorize_url(:redirect_uri => "http://localhost:3000/googleapp2/oauth2callback", :scope => 'email profile https://www.googleAPIs.com/auth/calendar https://www.google.com/m8/feeds')
end
Update the code above with your client_id, client_secret, redirect_uri and the scopes. The other parameters should stay unchanged.
Here the scopes are email, profile, calendar and contacts. The two first are very important to be able to have the email and domain of the account but also to have the user information such as first name, last name,..
Note (very important): Your scope here must be exactly the same that those you declared in your console. If you don’t put the same, you will fail the one-click sign in. It means that each user accessing the app will be prompted for granting the rights to access their data instead of only your domain administrator. Failing the one-click sign-in will forbid you being published in the Marketplace.
Note 2: after developing and testing your application, you will have to update the localhost URLs by the real URLs of your application.
If the information is correct, you are redirected to your redirect_uri with a code as parameter. This code can be used only once to retrieve the access_token.
def oauth2callback
  if params[:code].present?
    client = OAuth2::Client.new(
      "client_id from the web application",
      "client_secret from the web application",
      {
        :site => "http://localhost:3000",
        :token_url => "https://accounts.google.com/o/oauth2/token"}
    )
    token = client.auth_code.get_token(params[:code], :redirect_uri => "http://localhost:3000/googleapp2/oauth2callback")

    # The object token received contained data with the token itself, the expiration of the
    # token and one field id_token
    # id_token is a JWT string containing the information of the account. You can decode it
    # or use a gem to decode it. We used the jwt gem: https://github.com/progrium/ruby-jwt
    # Google has a live decoder if needed to check: https://developers.google.com/wallet/digital/docs/jwtdecoder

    data = JWT.decode(token['id_token'], nil, false)

    # you will get a hash like this one
    # iss: accounts.google.com
    # hd: domain_of_account.com
    # at_hash: Dzi-dmQssdezfME5px-Yal2Q
    # aud: client_id_for_web_application
    # azp: client_id_for_web_application
    # email_verified: 'true'
    # email: stef@mydemoproject.com
    # sub: '10278187122345341730884'
    # iat: 1392147073
    # exp: 1392150973

    # To retrieve the firstname and lastname of the user, you need to request google+
    # token object has all methods get, put, post and delete. The response received is an object
    # with a method parsed. This method decode the body of the response and return a hash
    user_info = token.get('https://www.googleAPIs.com/plus/v1/people/me/openIdConnect').parsed

    if data['email'].present?
      # You can now store/use the information retrieved
      session[:user_attributes] = {
        :email => data['email'],
        :domain => data['hd'],
        :first_name => user_info['given_name'],
        :last_name => user_info['family_name']
      }
      redirect_to follow_the_flow_of_your_application_url
    else
      redirect_to page_of_login_or_error_url
    end
  end
end
With this flow, you should be able to enter the URL of the index method in your browser and it should connect directly your application’s account.
To test the button of the Google app, you need to deploy your application and make sure that you changed the URLs localhost by the real ones.
8. Using API to access to an event of the primary calendar with oAuth2
To access the data we used the gem google-ruby-API-client (https://github.com/google/google-API-ruby-client)
With this gem, we will use the service account keys to access the data
# Load the private key. Note that ‘notasecret’ is the real string to put
key = Google::APIClient::PKCS12.load_key('path/to/your/privatekey.p12', 'notasecret')

# Instantiate the ApiClient object
client = Google::APIClient.new(:application_name => 'My App name', :application_version => '1.0')

# Setup the information for the authorization
client.authorization = Signet::OAuth2::Client.new(
            :token_credential_uri => 'https://accounts.google.com/o/oauth2/token',
            :audience => 'https://accounts.google.com/o/oauth2/token',
            :scope => 'https://www.googleAPIs.com/auth/calendar',
            :issuer => 'email address of your service account',
            :signing_key => key,
            :person => 'email of the user to get the info')

# Fetch the token
token = client.authorization.fetch_access_token!

# Load the API to use
calendar_API = client.discovered_API('calendar', 'v3')

# Access to the data with the correct API method
result = client.execute(:API_method => calendar_API.events.get, :parameters => {'calendarId' => 'primary', 'eventId' => 'google event id'})

# Get the hash of the event
event = result.data
The event is in the object result.data. It returns a hash with all the information of the event. You can see the detail of the hash here https://developers.google.com/google-apps/calendar/v3/reference/events.
To update, delete or create an event, only the API_method and the parameters change. All the process to retrieve the token and load the API is the same:
# The event hash is the object from result.data of the previous request
# Modify the event object
event['start']['dateTime'] = dt_start.strftime('%FT%T%:z')
event['end']['dateTime'] = dt_end.strftime('%FT%T%:z')

# Update the event in the calendar
result = client.execute(:API_method => calendar_API.events.update,
  :parameters => {'calendarId' => 'primary', 'eventId' => "google event id"},
  :body_object => event,
  :headers => {'Content-Type' => 'application/json'})

# Delete the event
client.execute(:API_method => calendar_API.events.delete,
    :parameters => {'calendarId' => 'primary', 'eventId' => "google event id"})

# Create a new event
# Create the hash object of the event
event = {
  "summary" => "Dentist appointment",
  "description" => "Hope it won’t hurt",
  "start" => {
    'dateTime' => "2014-03-03T14:00:09-07:00"
  },
  'end' => {
    'dateTime' => "2014-03-03T14:30:09-07:00"
  }
}

# Insert the event
result = client.execute(:API_method => calendar_API.events.insert,
      :parameters => {'calendarId' => 'primary'},
      :body => JSON.dump(event),
      :headers => {'Content-Type' => 'application/json'})
Note: when you create or update an event, be careful with the format of the date.
9. Using API to access to the contacts
To access the domain contacts, there is no API yet that seems compatible with oAuth2 (or it is really well hidden, and if you find it we would be glad to hear from you). The only thing that Google gives in their documentation is an URL to retrieve the user contacts.
https://developers.google.com/google-apps/contacts/v3/#retrieving_all_contacts
However, we still need to have an access_token to be able to retrieve them.
# Load the private key. Note that 'notasecret' is the real string to put
key = Google::APIClient::PKCS12.load_key('path/to/your/privatekey.p12', 'notasecret')

# Instantiate the ApiClient object
client = Google::APIClient.new(:application_name => 'My App name', :application_version => '1.0')

# Setup the information for the authorization
client.authorization = Signet::OAuth2::Client.new(
            :token_credential_uri => 'https://accounts.google.com/o/oauth2/token',
            :audience => 'https://accounts.google.com/o/oauth2/token',
            :scope => 'https://www.google.com/m8/feeds',
            :issuer => 'email address of your service account',
            :signing_key => key,
            :person => 'email of the user to get the info')

# Fetch the token
token = client.authorization.fetch_access_token!

# Retrieve the data
MAX_RESULT_CONTACTS = 5000
response = RestClient.get("https://www.google.com/m8/feeds/contacts/default/full?access_token="+token['access_token']+"&max-results="+MAX_RESULT_CONTACTS)
In the response.body you will get all the contacts (at least MAX_RESULT_CONTACTS) in xml. Then you have to parse the xml to extract and format the data according to your needs.
10. Publish the Google app
Now that the login and the access to the data are done and tested, it is time to publish the Google application.
First, you have to create the elements needed:
If this is the first time you publish an app, you have to pay fees at:
https://chrome.google.com/webstore/developer/dashboard
Create a manifest.json file
{
  "manifest_version": 2,
  "name": "Welcome Aboard",
  "version": "0.0.0.1",
  "description": "a plain text description",
  "icons": {
    "128": "icons/128x128-icon.png",
    "16": "icons/16x16-icon.png"
  },
  "container": ["DOMAIN_INSTALLABLE"],
  "API_console_project_id": "428464274542"
}
Modify the name and the description according with your application.
Modify the name of the icons if necessary. The path of the icons is relative to the file manifest.json.
DOMAIN_INSTALLABLE is the default container for the Marketplace, this is the way to specify that you want to be published in the Marketplace.
Add GOOGLE_DRIVE in the container list if your application is a drive application else not.
Note: if your application is internationalized, you can add locales to your manifest.
You can have a complete list of supported locales here: https://developers.google.com/chrome/web-store/docs/i18n
Add 2 icons :
- 128 * 128px
- 16px * 16px
Create a zip file with your manifest file, the icons directory and if used the _locales directory.
Create screenshots. You need at least one screenshot. It is recommended to have 4 to 5 screenshots. If you have locales, you can add screenshots showing the different languages.
Create promotional images. You need to have at least one small image. It shouldn’t be a screenshot of your application and shouldn’t have text depending on the locale.
- Small: 440 * 280px
- Large: 920 * 680px
- Marquee: 1400 * 560px
You have examples here: https://developers.google.com/chrome/web-store/docs/images?hl=en&csw=1#promo
When you have all these elements, you are ready to publish your application.
Note important: as weird as it seems you have to set the visibility to “any one on the Chrome Webstore” even if you want to publish your app to the Marketplace. What tells in fact that your app is not in the Chrome Webstore but in the Google Apps Marketplace is the DOMAIN_INSTALLABLE container in the manifest of the app.
You are now one step away from the real publication of your app to the Marketplace.
And to do it you will also need to do a short demo video of the install flow and how you use the API.
We’re now at the step 7 of the steps detailed at the bottom of this page: https://developers.google.com/apps-marketplace/listing. Follow the link provided and fill-in the form to get your app reviewed by a human and published in the Marketplace. You will have to pay 100$ for your app to be reviewed if it’s the first app that you ever submitted to the Marketplace.
!!! HURRAY !!!
This tutorial is provided by the dev team at You Don’t Need a CRM! a SaaS no CRM software that helps you track and close your deals without spending hours filling-in forms. We’ll be glad to hear from you. Fell free to test our app. Enjoy.
Appendix A/ Finding your app in the Marketplace and installing it to your Google Apps for Business domain.
But where is the App? You remember at the beginning of this post, I told you that the new Marketplace was a little bit in the middle of nowhere? As of april 2014 the app you just published is not present in the old Marketplace (in the future the new version of the Marketplace will probably replace the old one so their won’t be any problem and your app will be easily visible, but it’s not yet the case). To add your app you have to:
- Go to https://admin.google.com (you must be admin of your domain but I guess you are)
- Click on the Marketplace Apps logo ()
- In the new page click on the top right “Add Marketplace App” icon ( )
- Scroll down until you find your application (or until you find ours : “You Do NOT Need a CRM” if you want to test it), then click on it to install. Hurray again!!!
Beware not to use the sharing link that is provided, as it points to a page in the Chrome Webstore where your app is displayed but cannot be installed or rated (again this is the situation in April 2014).
Once installed, all the users of your domain can access your app.
Appendix B/ Migrating your old 2legged-OAuth 1 app of the old Marketplace, to the new OAuth2 app of the new Marketplace.
Once you have done each of the previous step for your new app you need to get the Chrome Webstore ID of your app (you can find it by clicking on the name of your app in your developer dashboard). For example our URL is https://chrome.google.com/webstore/detail/you-dont-need-a-crm/dlgmbdkbbkgihlglfgodoppappbcelkm so our ID is dlgm….celkm.
Once you have this ID, go to your vendor profile in the old Marketplace, edit your app listing and you will see a Chrome Webstore Item ID at the bottom right of the page. Paste your Chrome ID and that’s it. Now when someone will access your old Marketplace page and will try to install the app, he will in fact install the new version.
Last thing to do is now to migrate users of the old app to the new app and you can do it using the UpgradeableApp API. You have to do some simple calls like this PUT
https://www.googleAPIs.com/appsmarket/v2/upgradableApp/listingID/cwsID/domain
and it’s quite cleary documented here : https://developers.google.com/apps-marketplace/v1migratev2
Post-scriptum:
We hope that this tutorial will save you tons of time. We would be glad to hear from you especially if there is a need for corrections.
If you want to try our app, you can find it through the Google App Marketplace (You Do Not need a CRM) or via our website http://YouDontNeedaCRM.com
This is a rails application that helps sales people track and close their deals without wasting time filling-in forms. If you’re a small business and if you want to manage your sales pipeline in an efficient way, it worth the try.
Enjoy !
